Procreate Gestures + Shortcuts Cheat Sheet
Scroll down for the written list or if you prefer video, check out the brief, detailed YouTube video to the right.
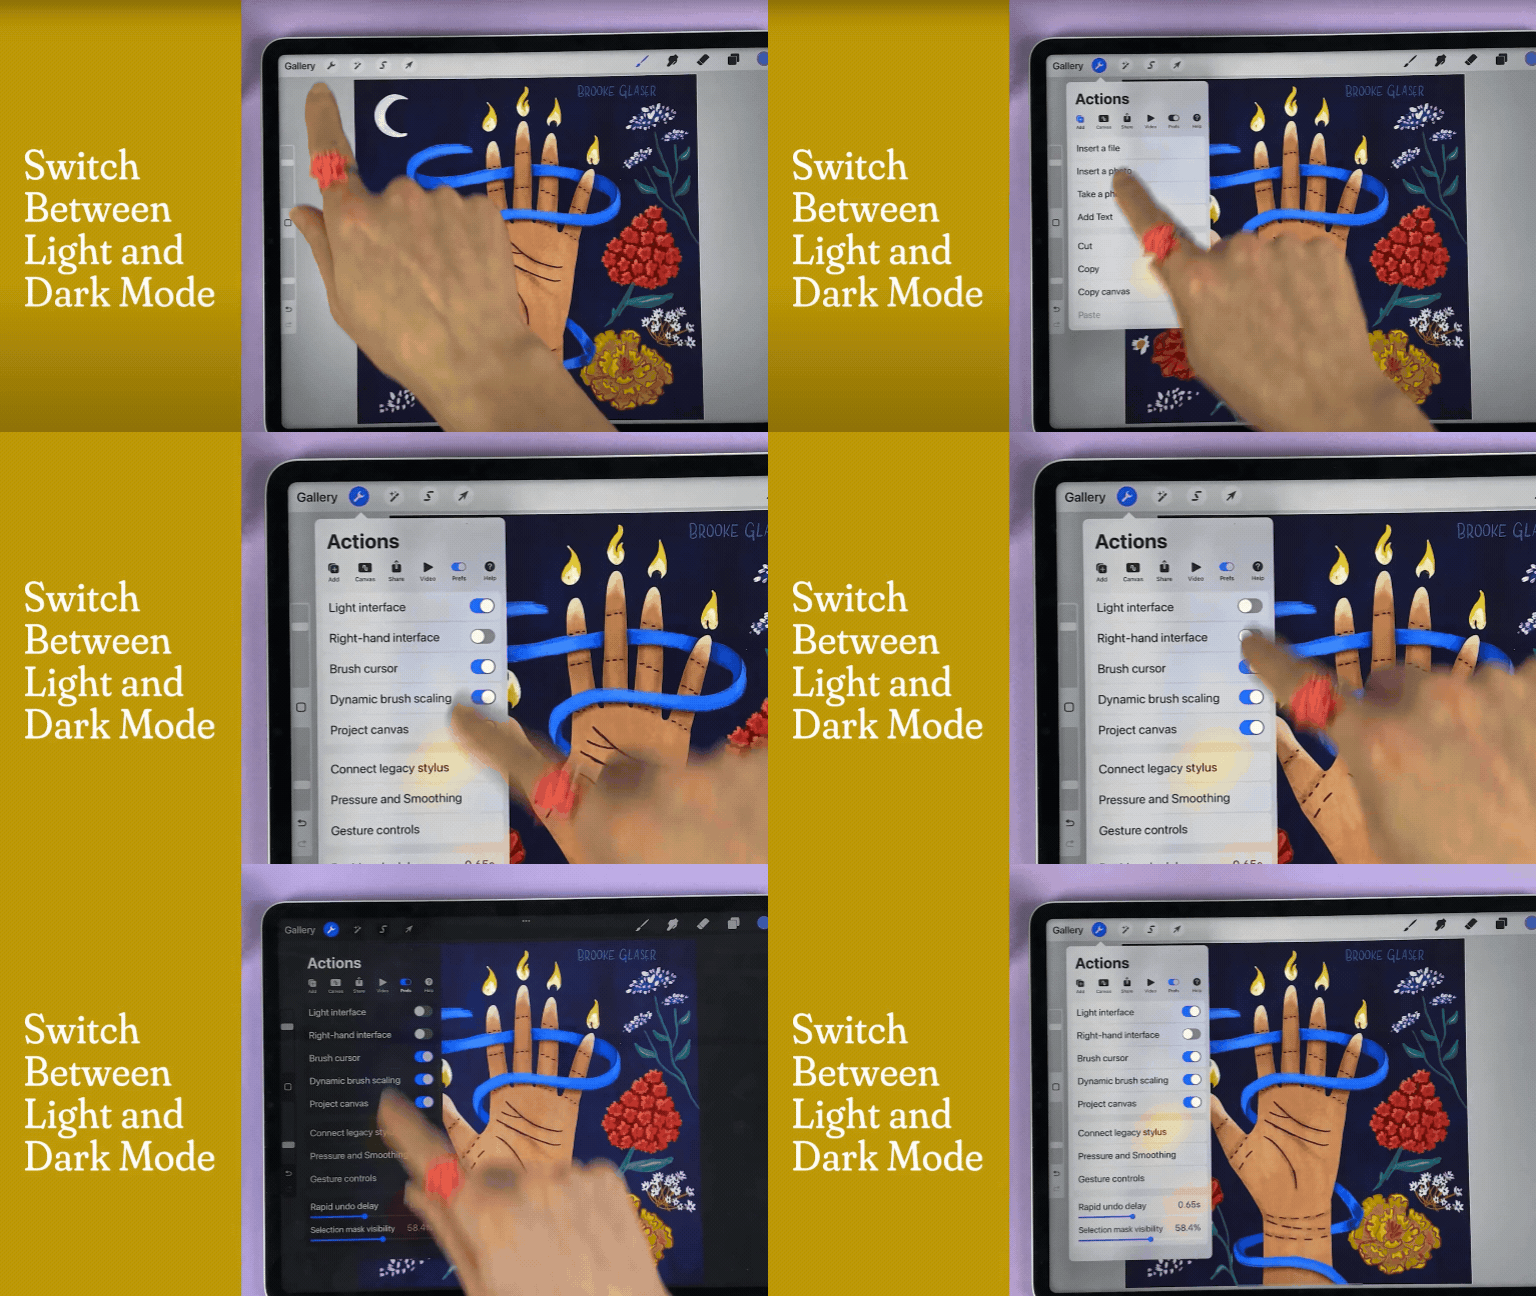
Switch Between Light and Dark Mode
Tap the Wrench Icon → Preferences → Toggle “Light interface” on or off
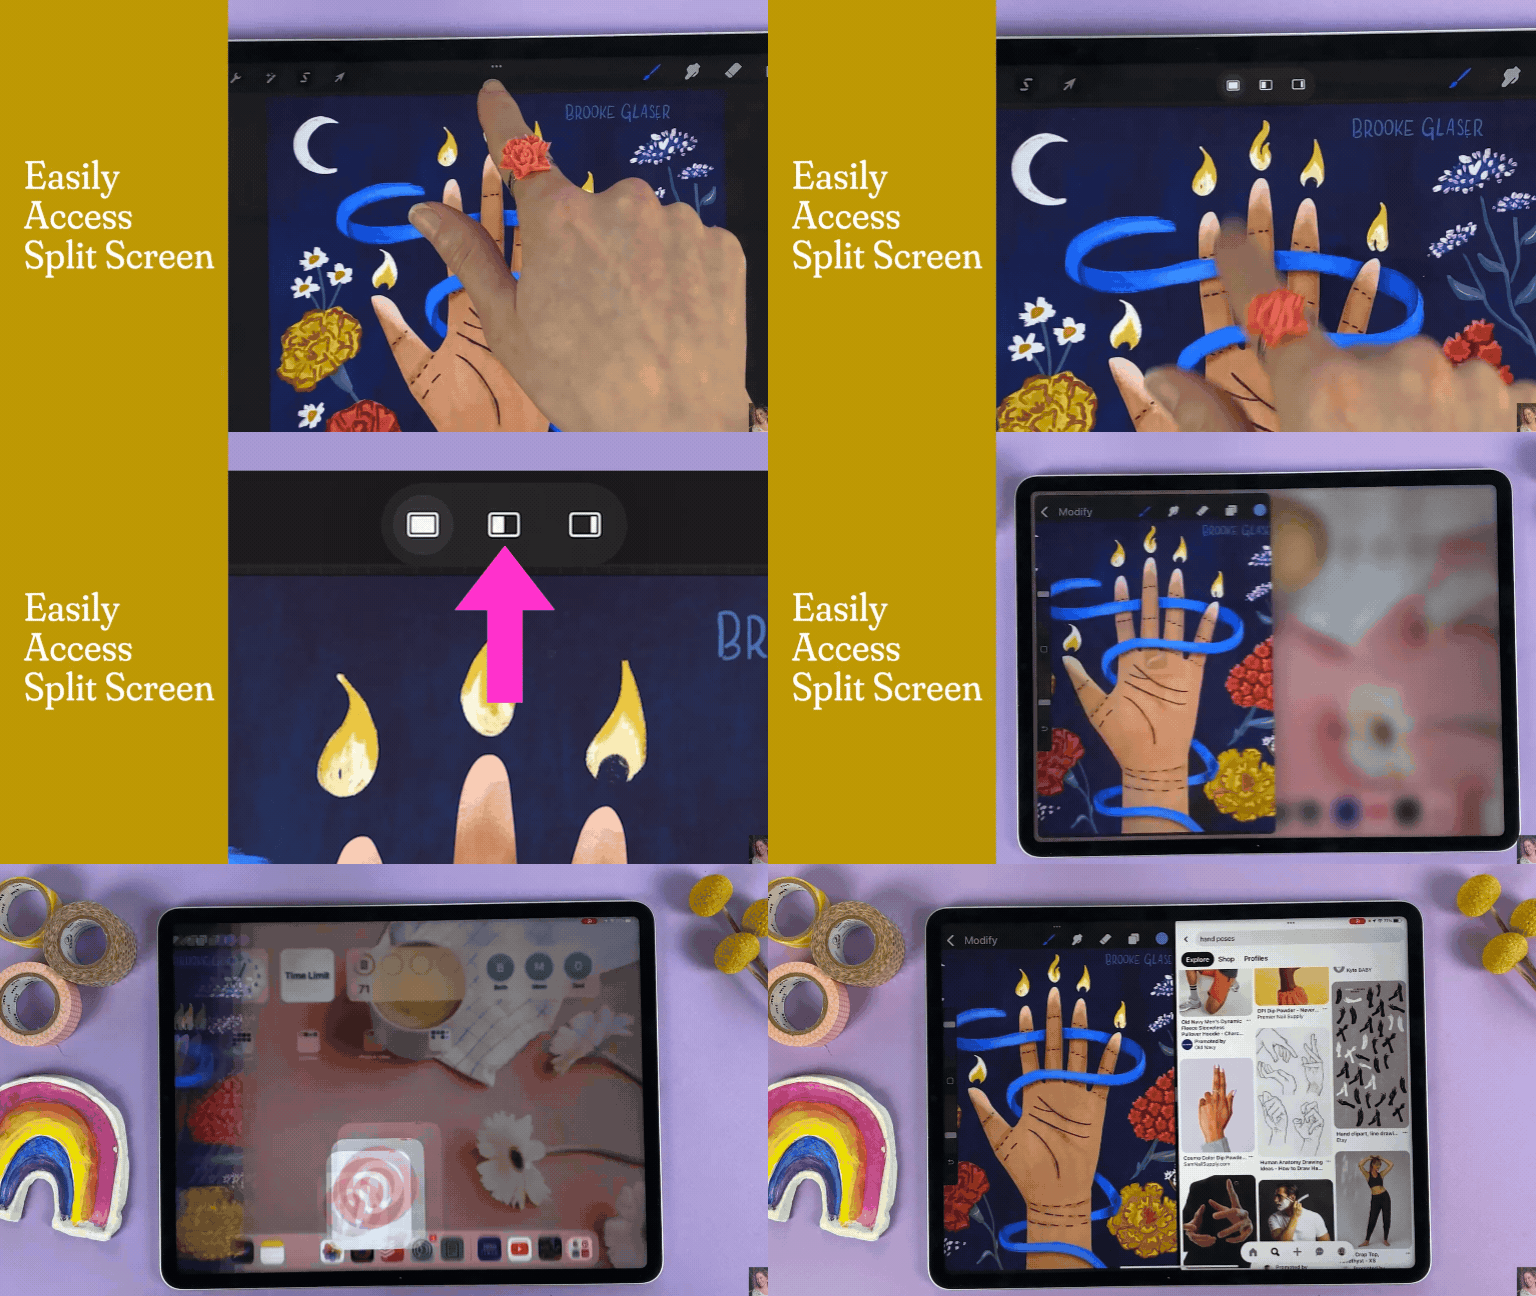
Easily Access Split Screen Mode
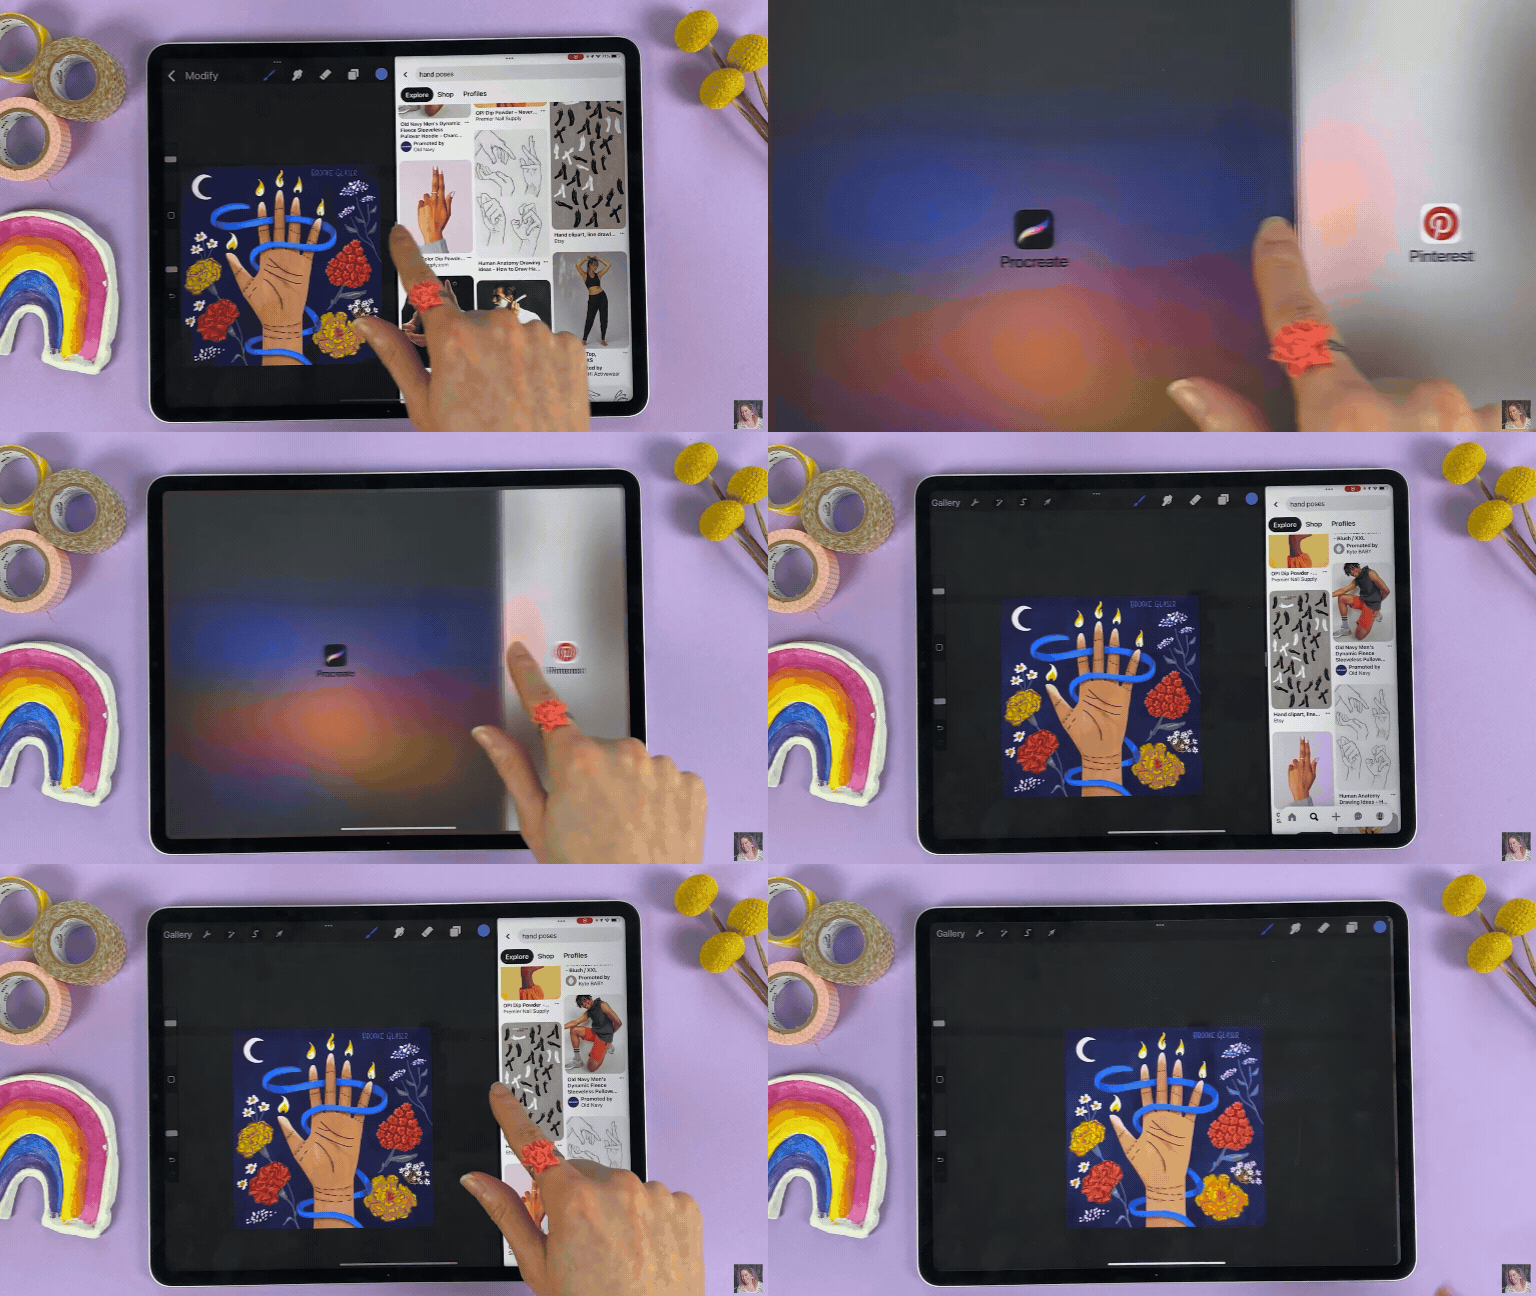
Use Procreate and another app at the same time by tapping the three dots at the top of the page, selecting the middle icon, and choosing whichever app you’d like to reference. You can now use both apps at the same time.
Bonus Tip: You can resize the screen by sliding the middle bar to one side or the other. Slide it all the way to one side to exit one of the open apps.
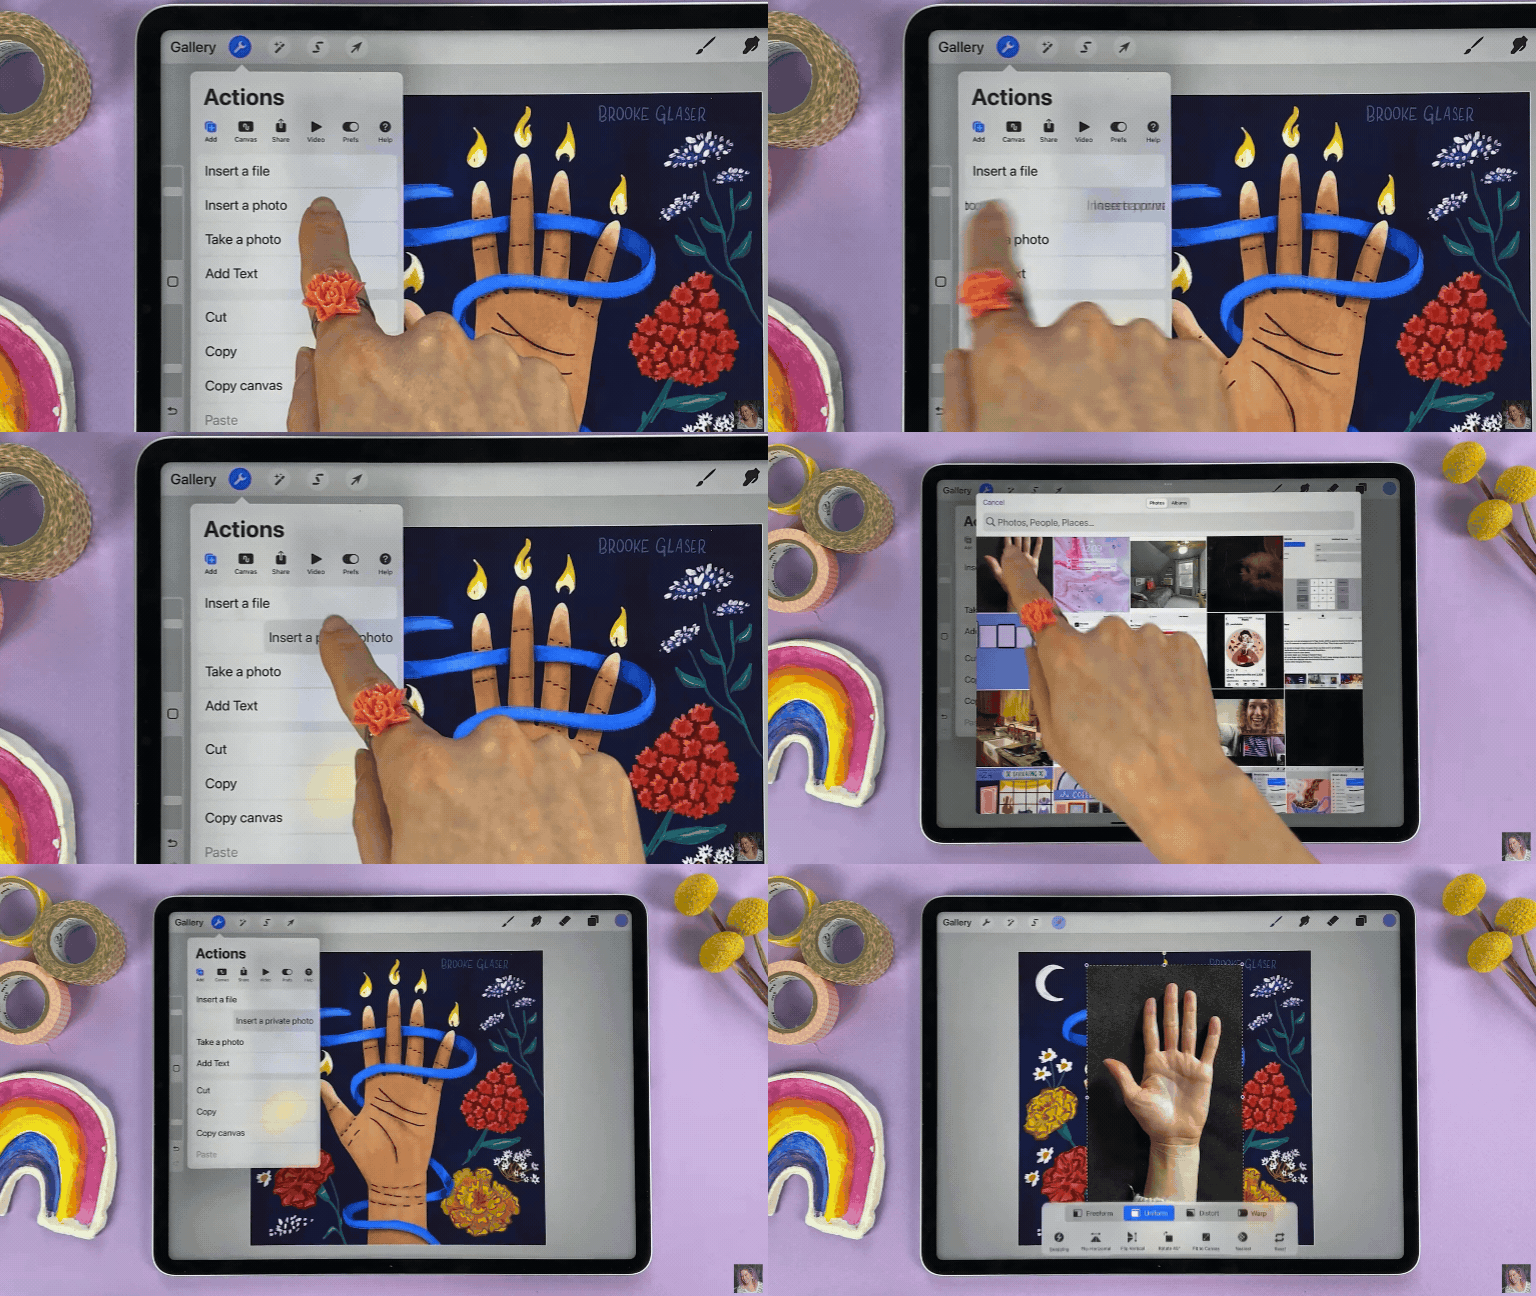
Add a Private Photo
Here’s how to add a private photo that wont show up in time lapses:
Tap the Wrench Icon → Add → Swipe “Insert a Photo” button to the left → Select Private Photo
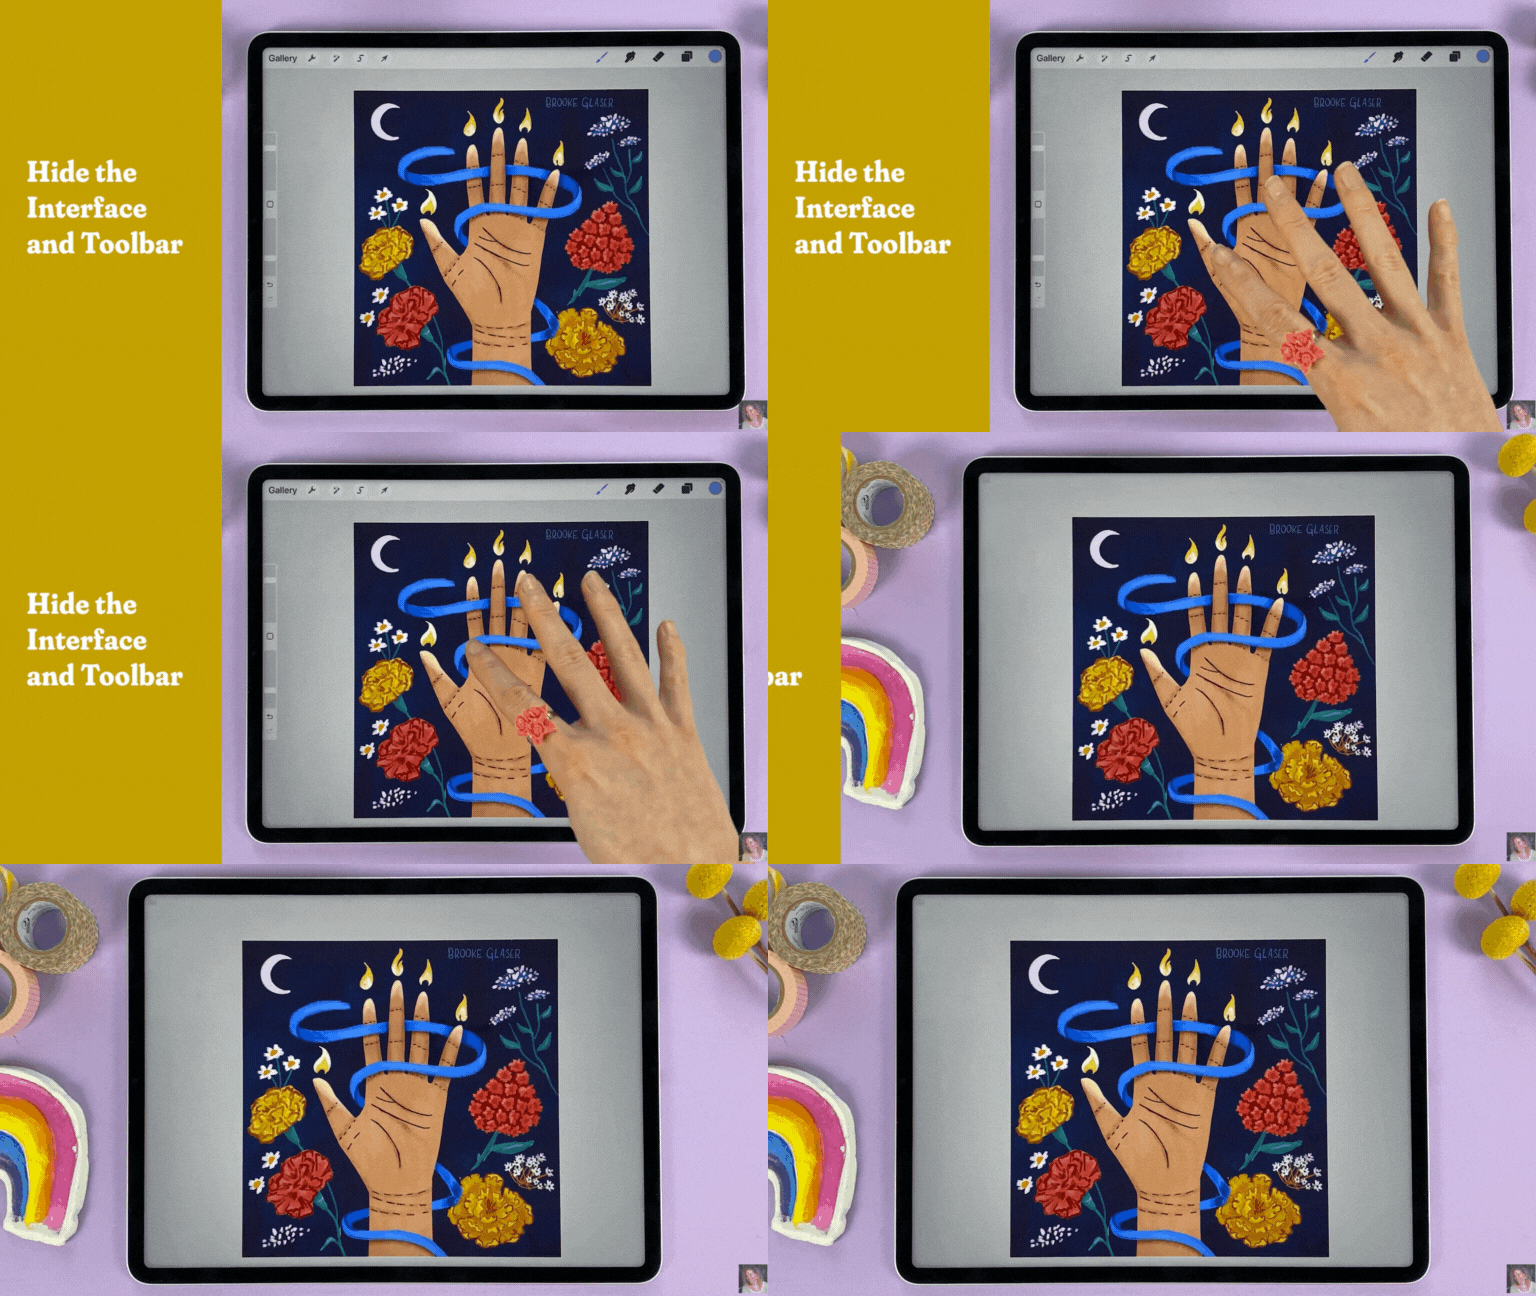
Hide the Interface & Toolbar — Full Screen Drawing Mode
Tap four fingers to go into full screen drawing mode. Tap four fingers again to bring back the toolbar and interface.
Learn how to make beautiful art in Procreate
In this comprehensive class, you’ll learn everything you can do in Procreate through a series of fun drawing projects. The best part? The class is taught through short, step-by-step lessons so you’ll never feel overwhelmed.
And there’s no drawing experience required!
Whether you’re a beginner or a seasoned artist, Procreate for Beginners will take your digital drawing skills to the next level.
(no drawing experience required!)
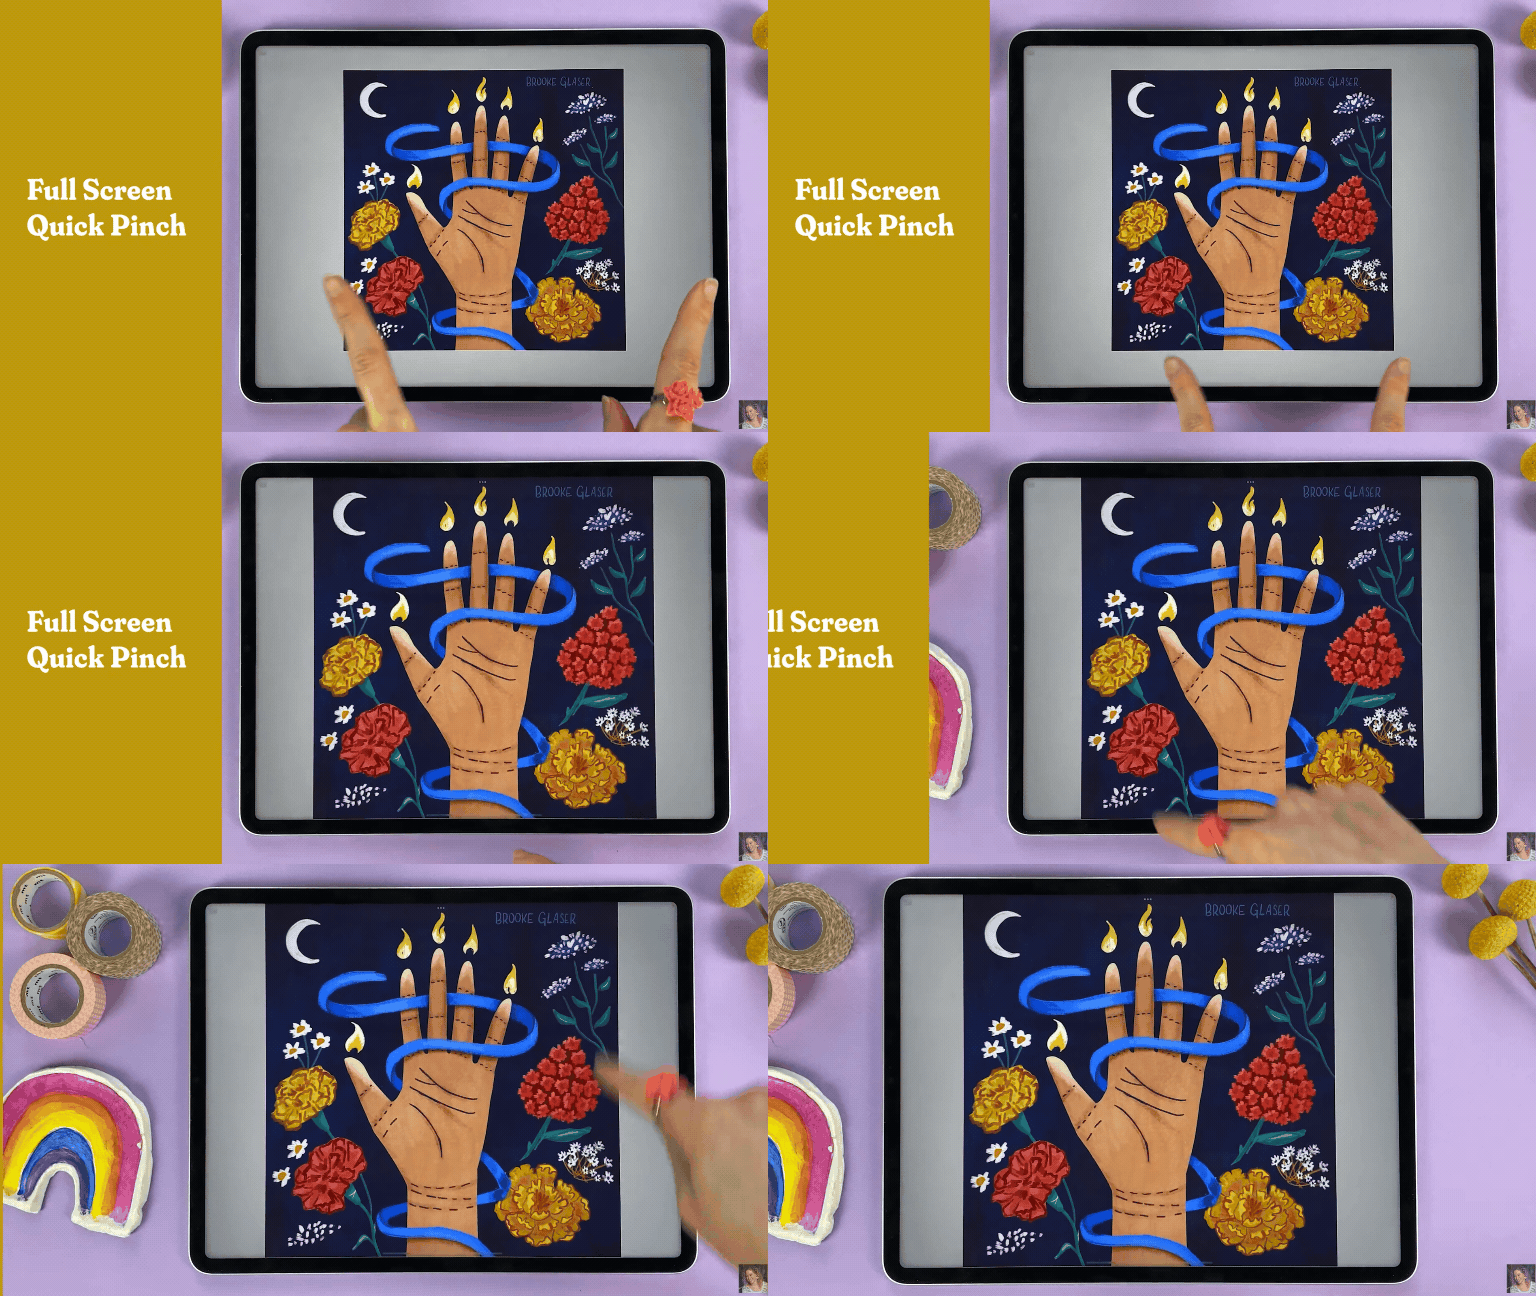
Full Screen Quick Pinch
Quickly fit your entire canvas to the screen using a two finger pinch.
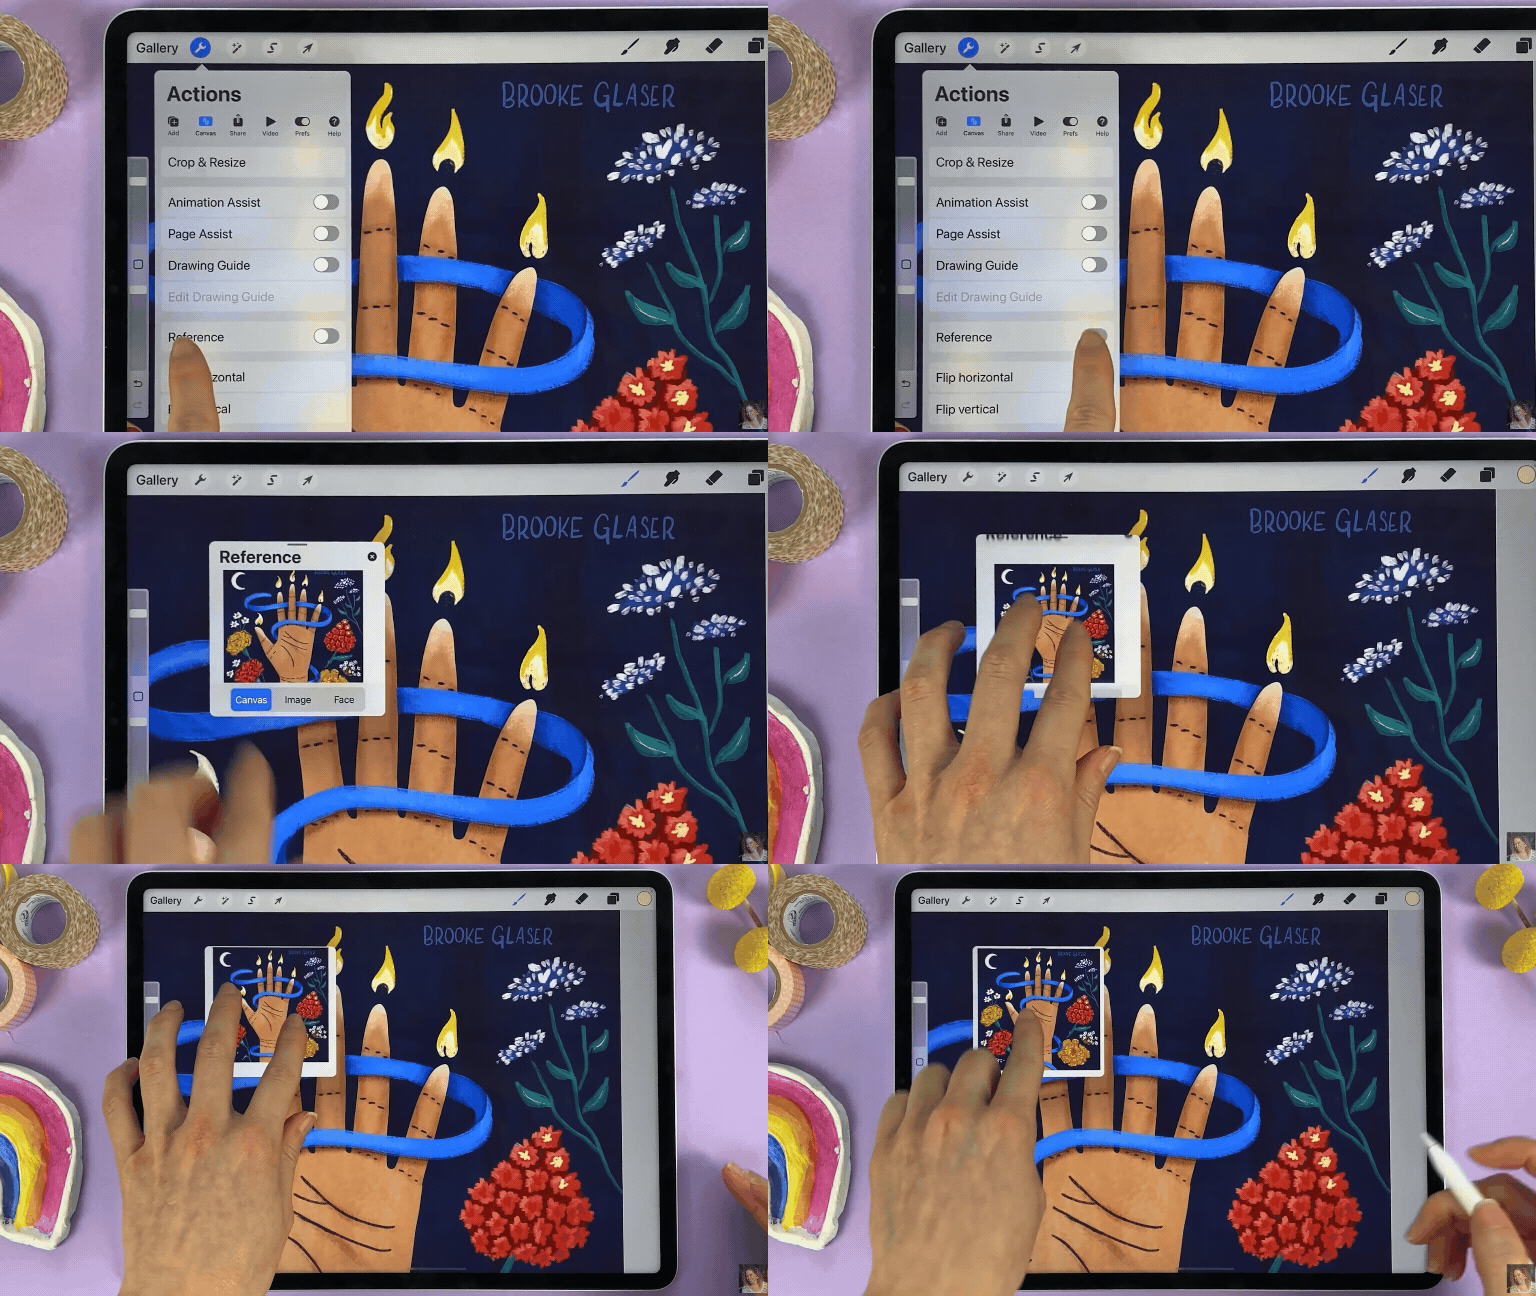
Reference Panel for Viewing Your Art from a Distance
If you’re working on small details and want to see the impact that they’re having on your entire piece, you can add a reference panel so you don’t have to keep zooming in and out on your artwork.
Tap the Wrench icon → Canvas → Reference
Now you have a full reference of your image and can reference both the details and the full piece at once.
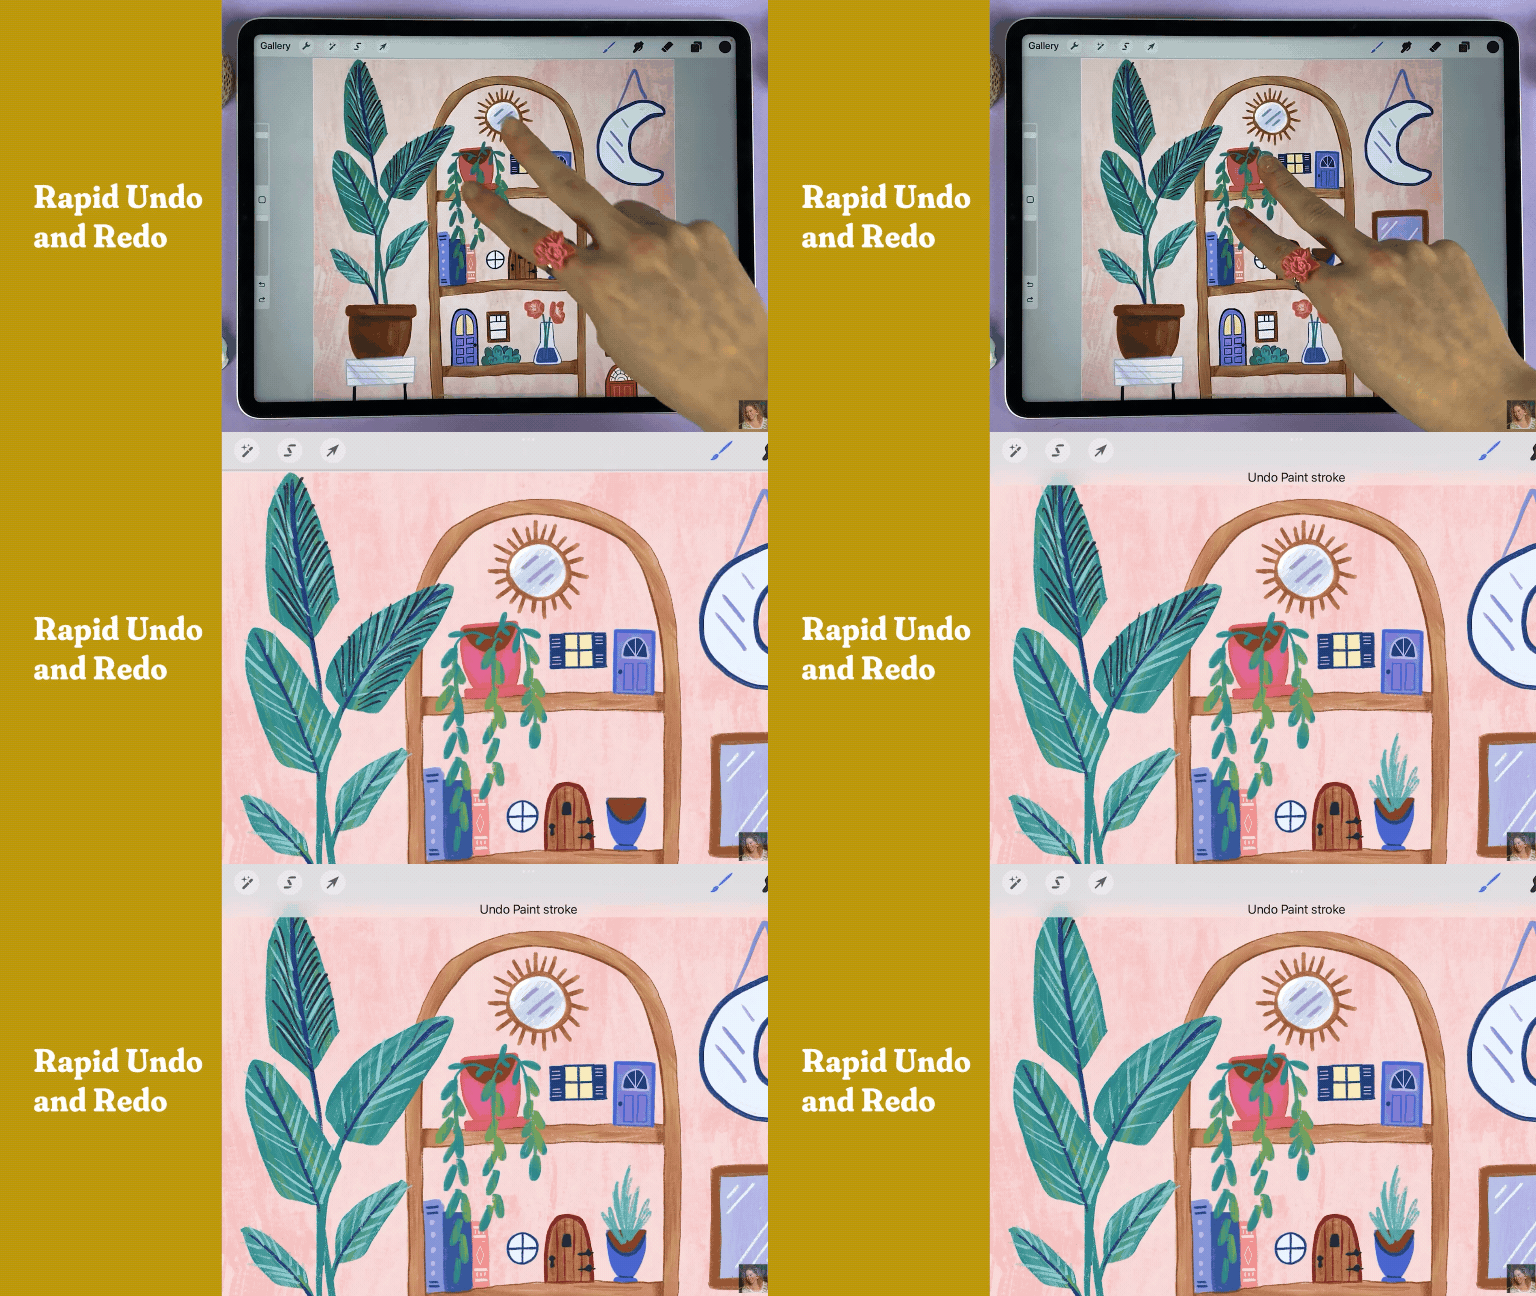
Rapid Undo & Redo
You can undo by tapping two fingers and redo by tapping three fingers.
If you hold your fingers down, it will continue to undo or redo until you lift your fingers up.
To rapidly undo, hold down two fingers on your canvas. To rapidly redo, hold down three fingers.
Clear a Layer
To clear the entire contents of a layer, make sure you have the layer you want to clear selected, then wiggle three fingers back and forth on the screen.
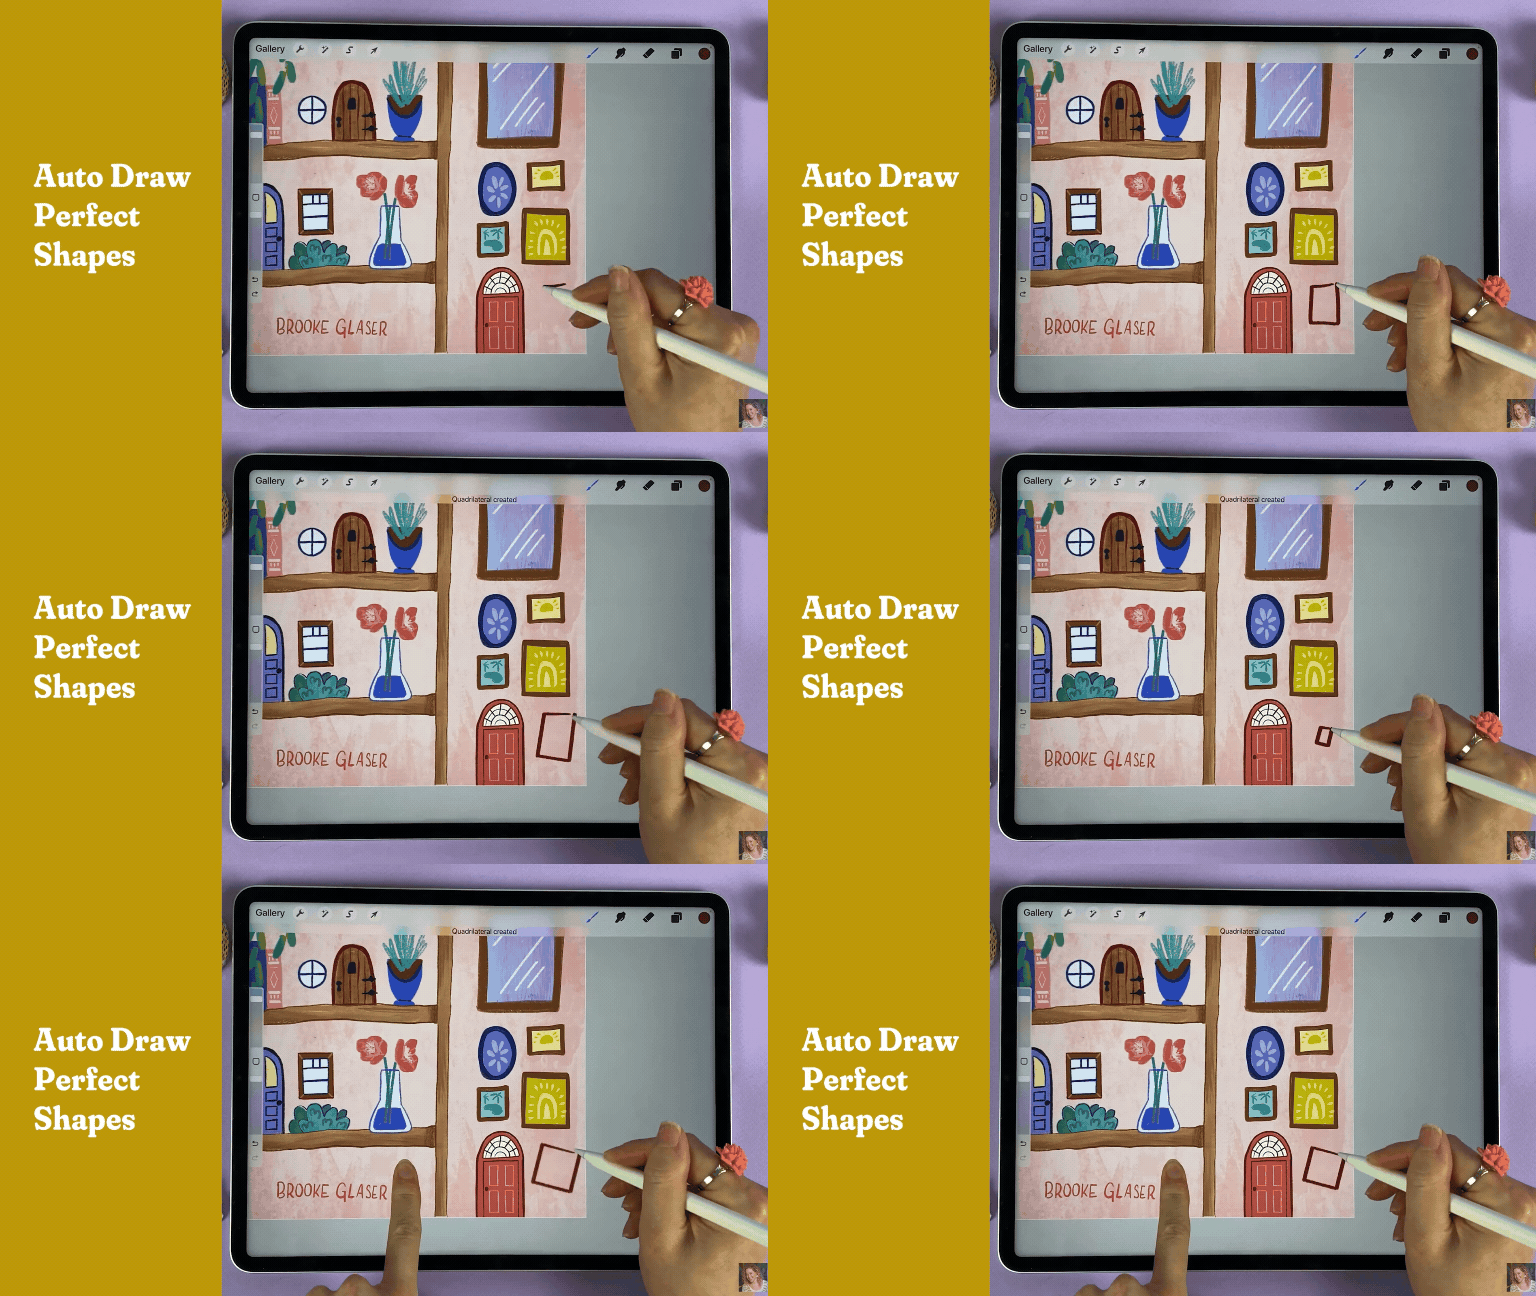
Quick Shape Tool
(Auto-draw perfect shapes and straight lines)
Can’t draw a perfect square, circle or triangle? No problem! When you draw one of these shapes, hold your pencil down on the canvas and it will snap to a quick shape.
If you take your finger and tap and hold on the screen, the shape will snap to a PERFECT shape. You can resize your shape while your pencil is still held down and release it when you’re happy with how the shape looks.
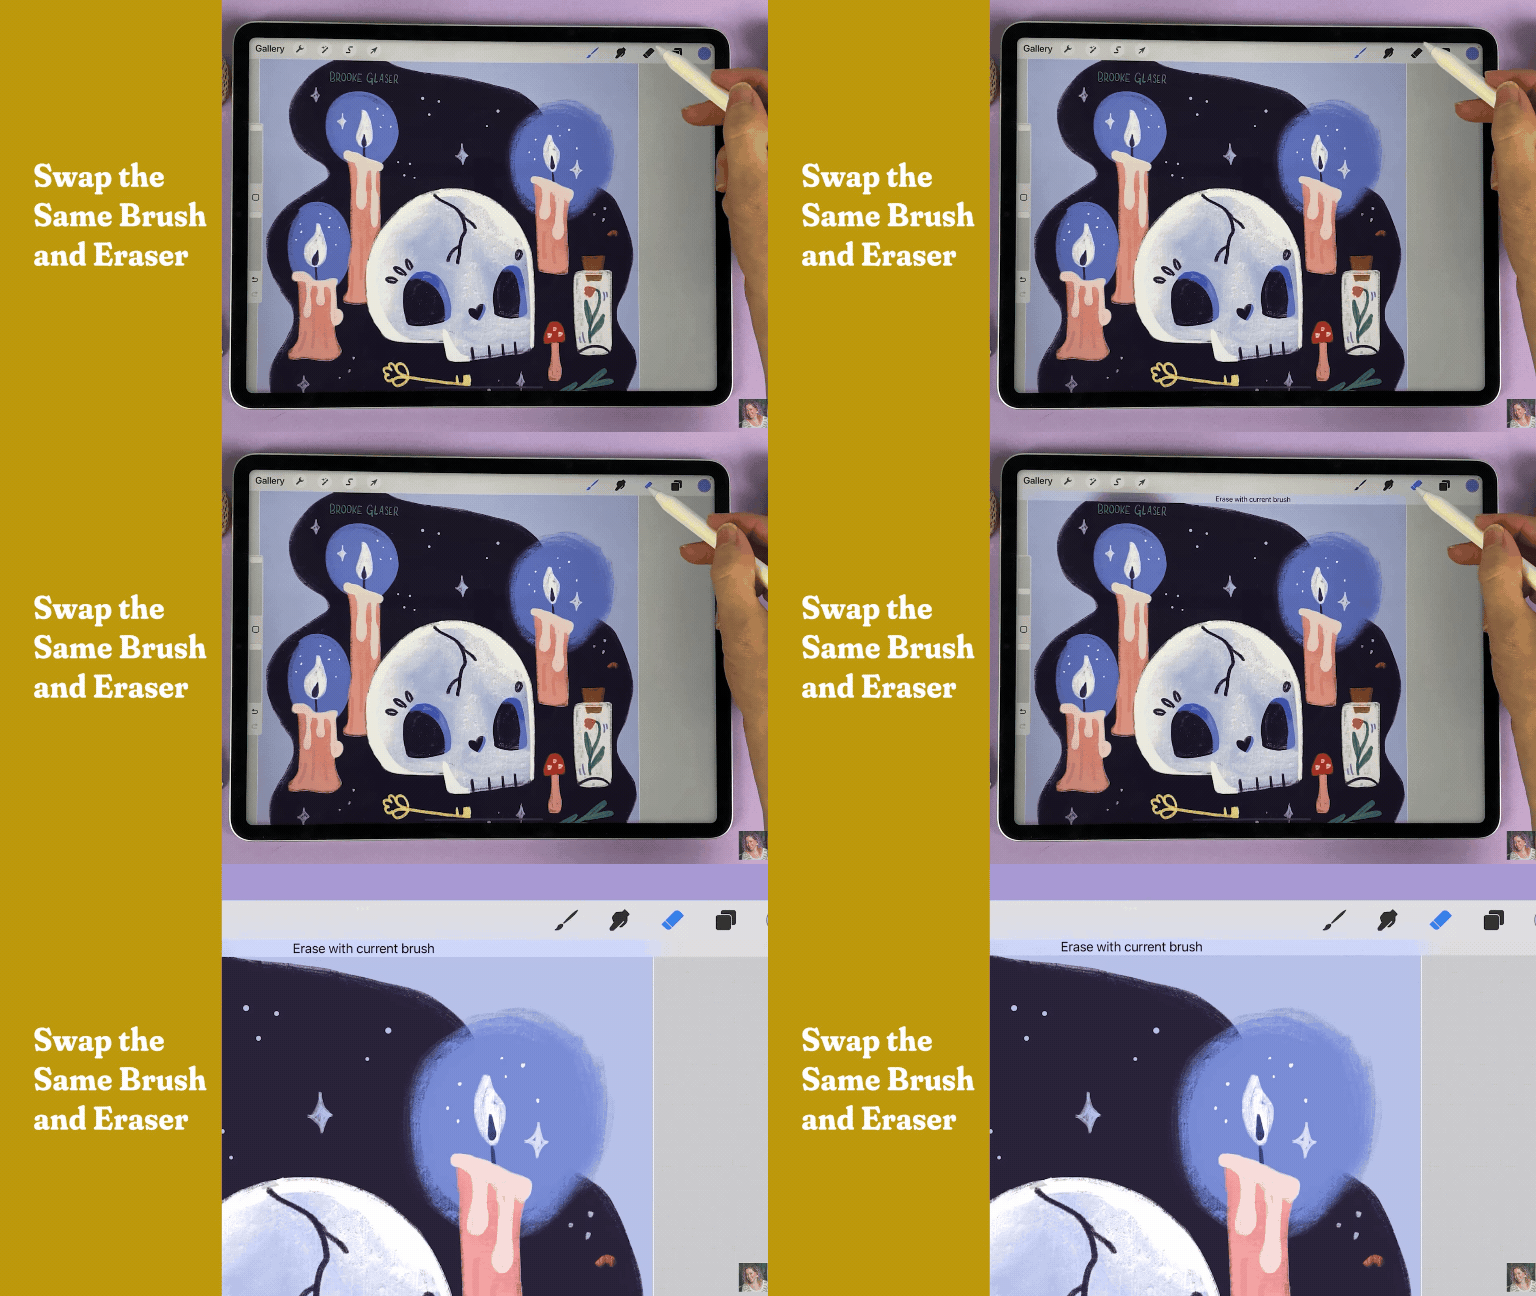
Use the Same Brush and Eraser
If you want to erase with the same brush that you’re drawing with, tap and hold on the eraser icon. It will automatically turn the eraser into the same brush that you’ve been using to draw. This is especially helpful if you’re using a brush with a lot of texture!
Bonus Tip: The same gesture works with the smudge tool!
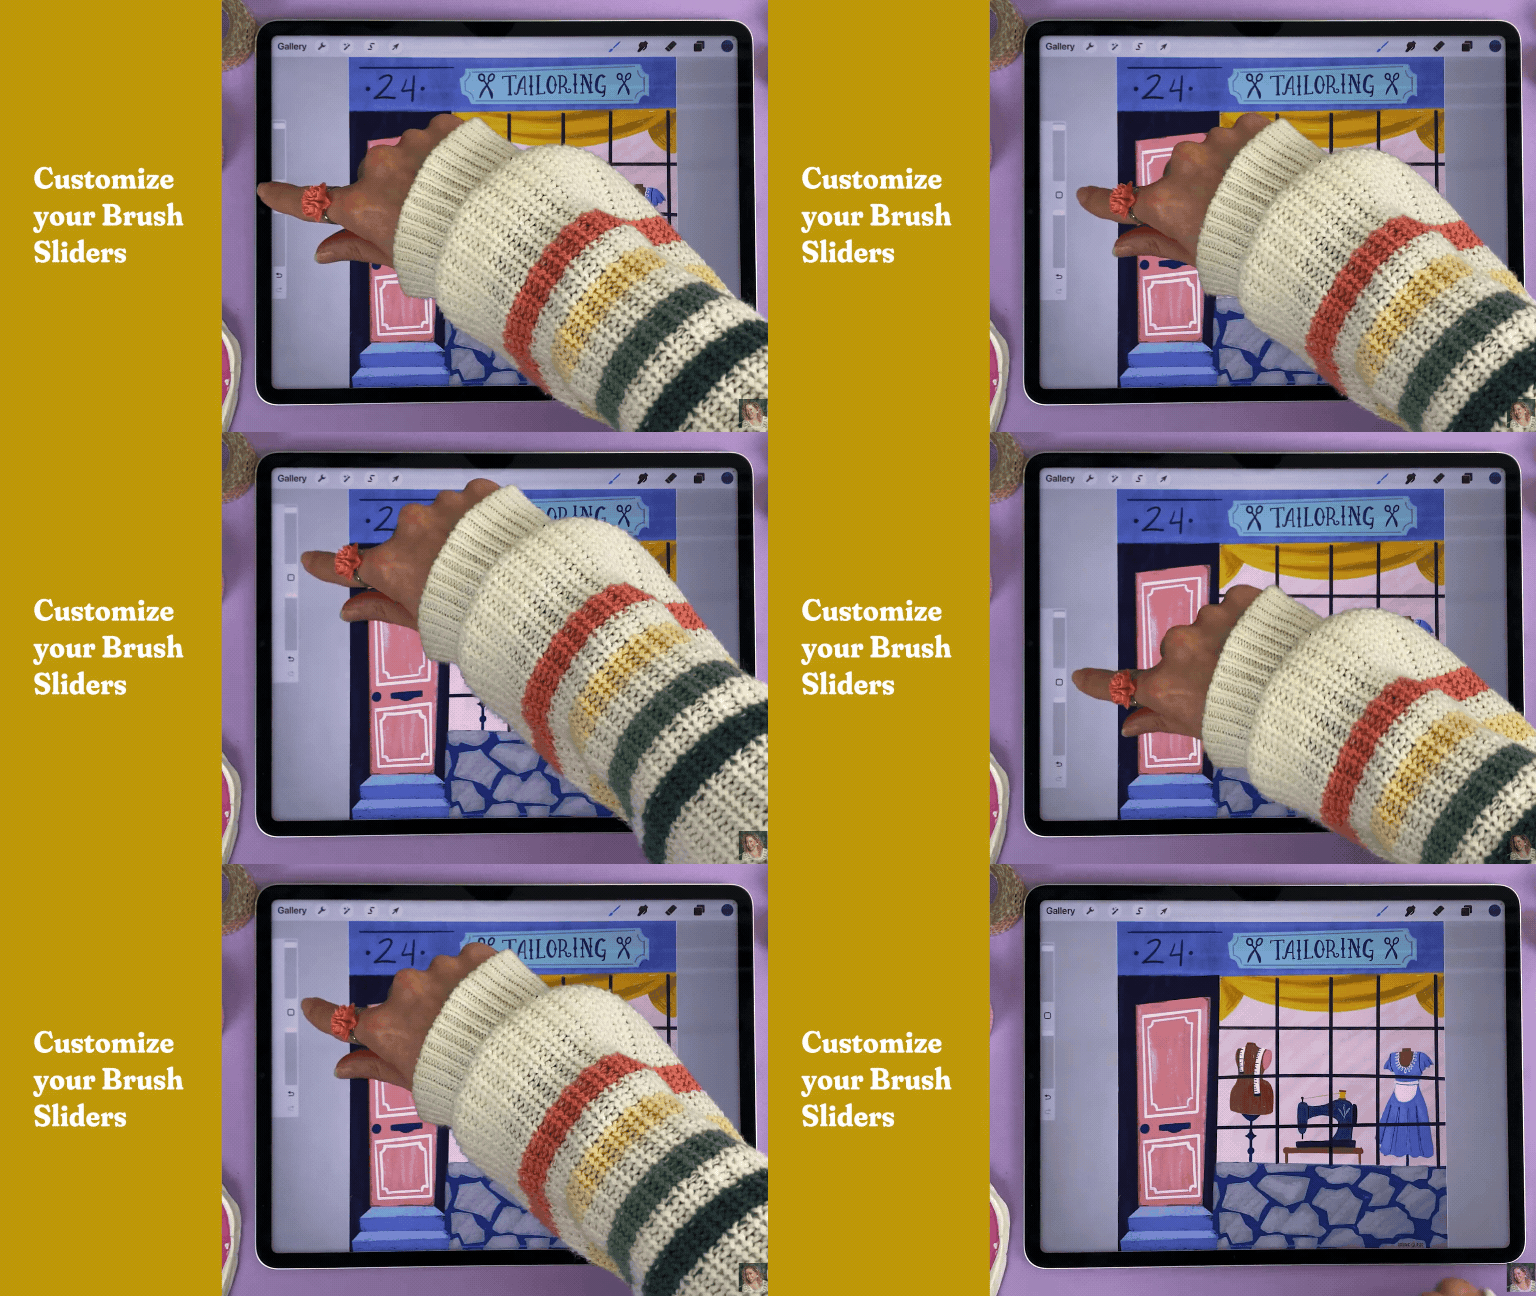
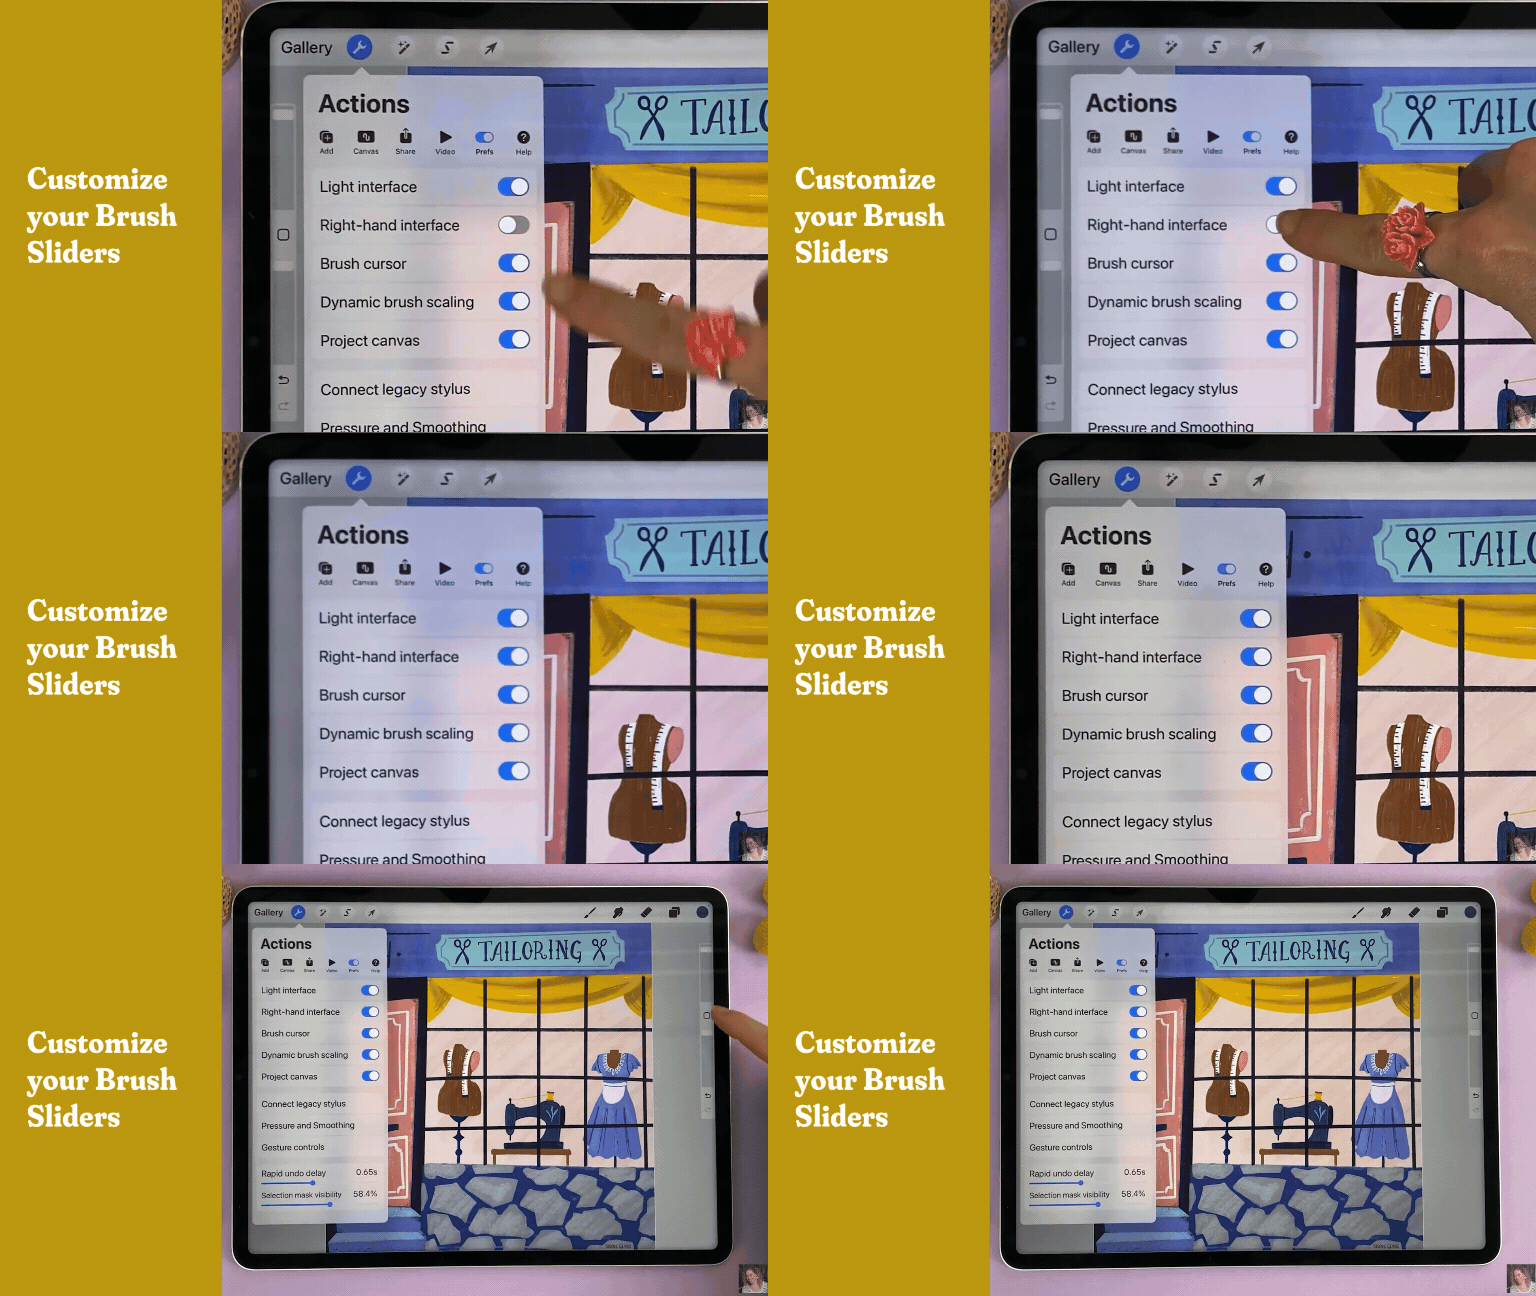
Customize the Brush and Opacity Sliders
To move the placement of the brush and opacity sliders, pull them out and then you can reposition them.
Left-Handed Interface
Left handed? Move the brush and opacity sliders to the other side of the canvas!
Tap the Wrench Icon → Preference Tab → Toggle “Right-Hand Interface” on
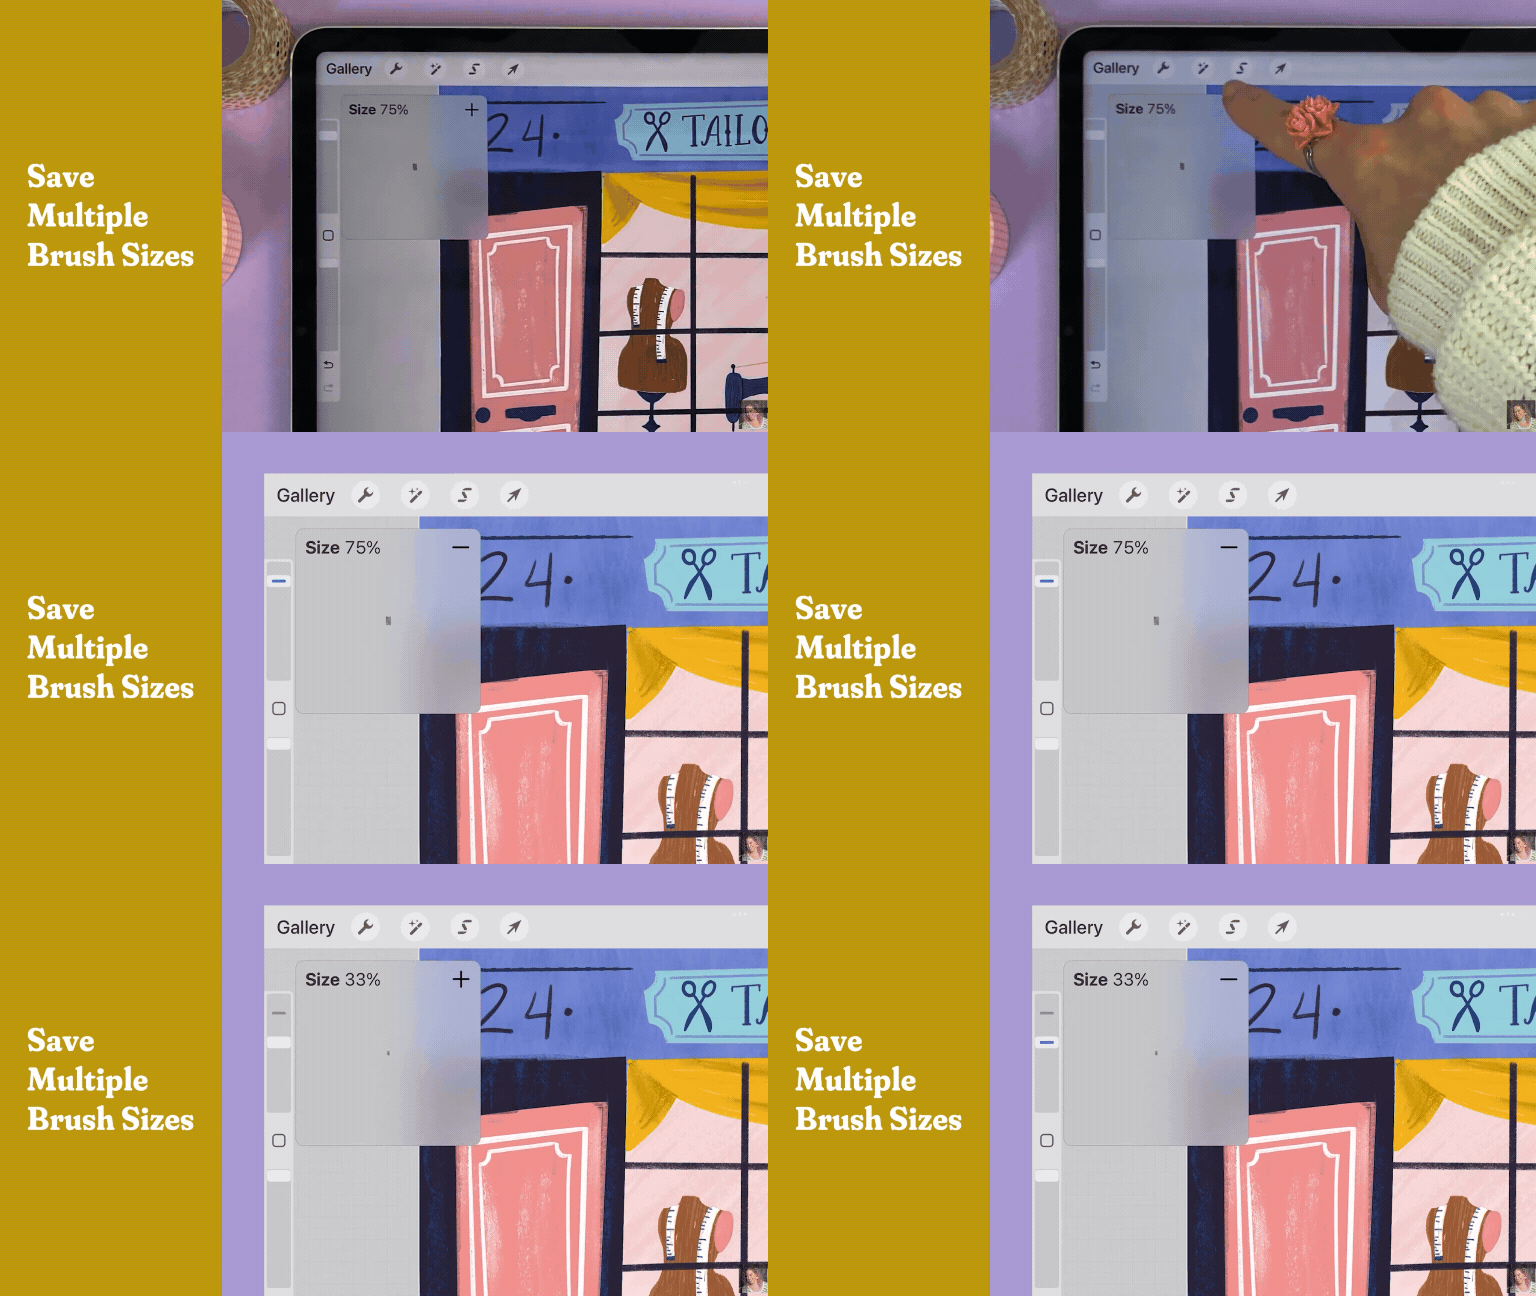
Save Multiple Brush and Opacity Sizes with Precise Slider Controls
If you are working on a piece that requires you to switch between brush sizes frequently, you can save the brush sizes on the brush slider to quickly switch to the exact brush size you need rather than just guessing!
Slide to the brush size you want to save and then tap the “+” icon to save it. You can do this with as many brush sizes as you need!
Now you can swap sizes with the tap of a button. You can also do the same thing with the opacity slider.
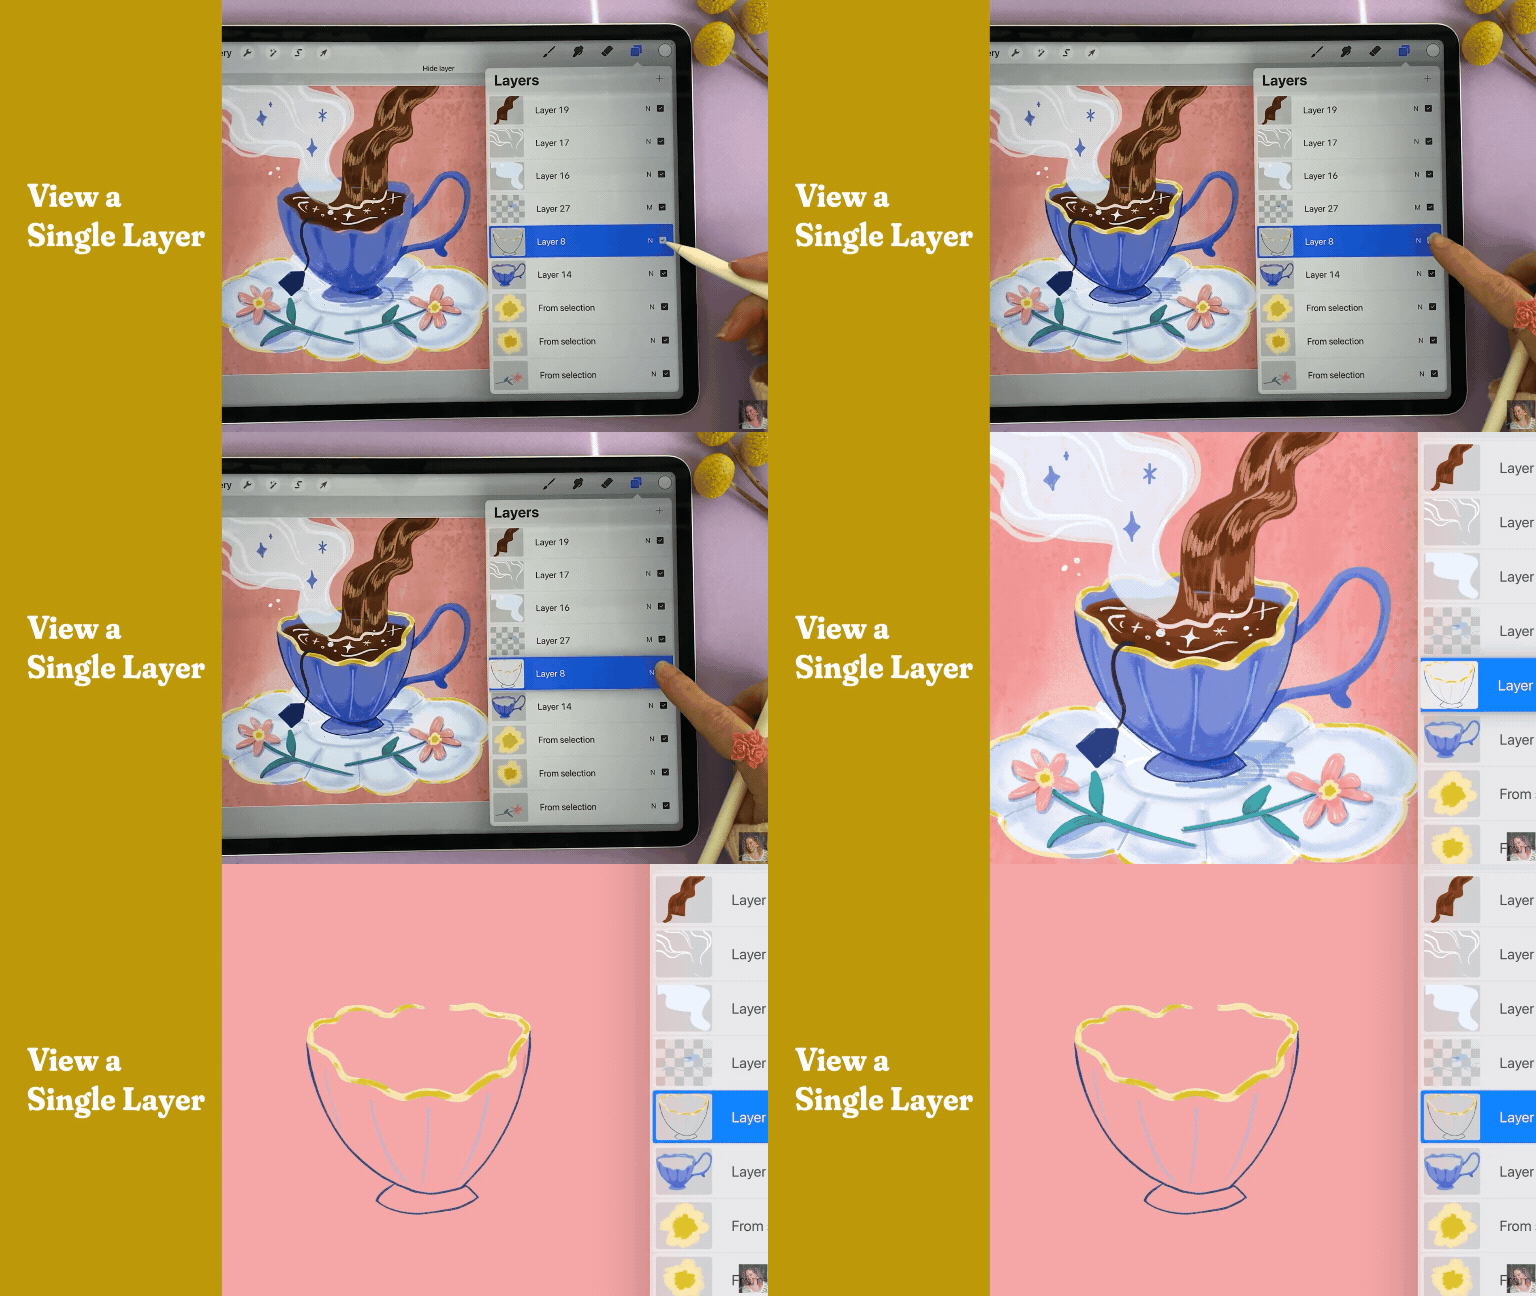
View a Single Layer
When you’re working with multiple layers, it can be hard to know what exactly is on each one. If you open the layers tab and tap and hold the checkbox on the layer it will hide all the other layers so that you can clearly view the single layer on its own.
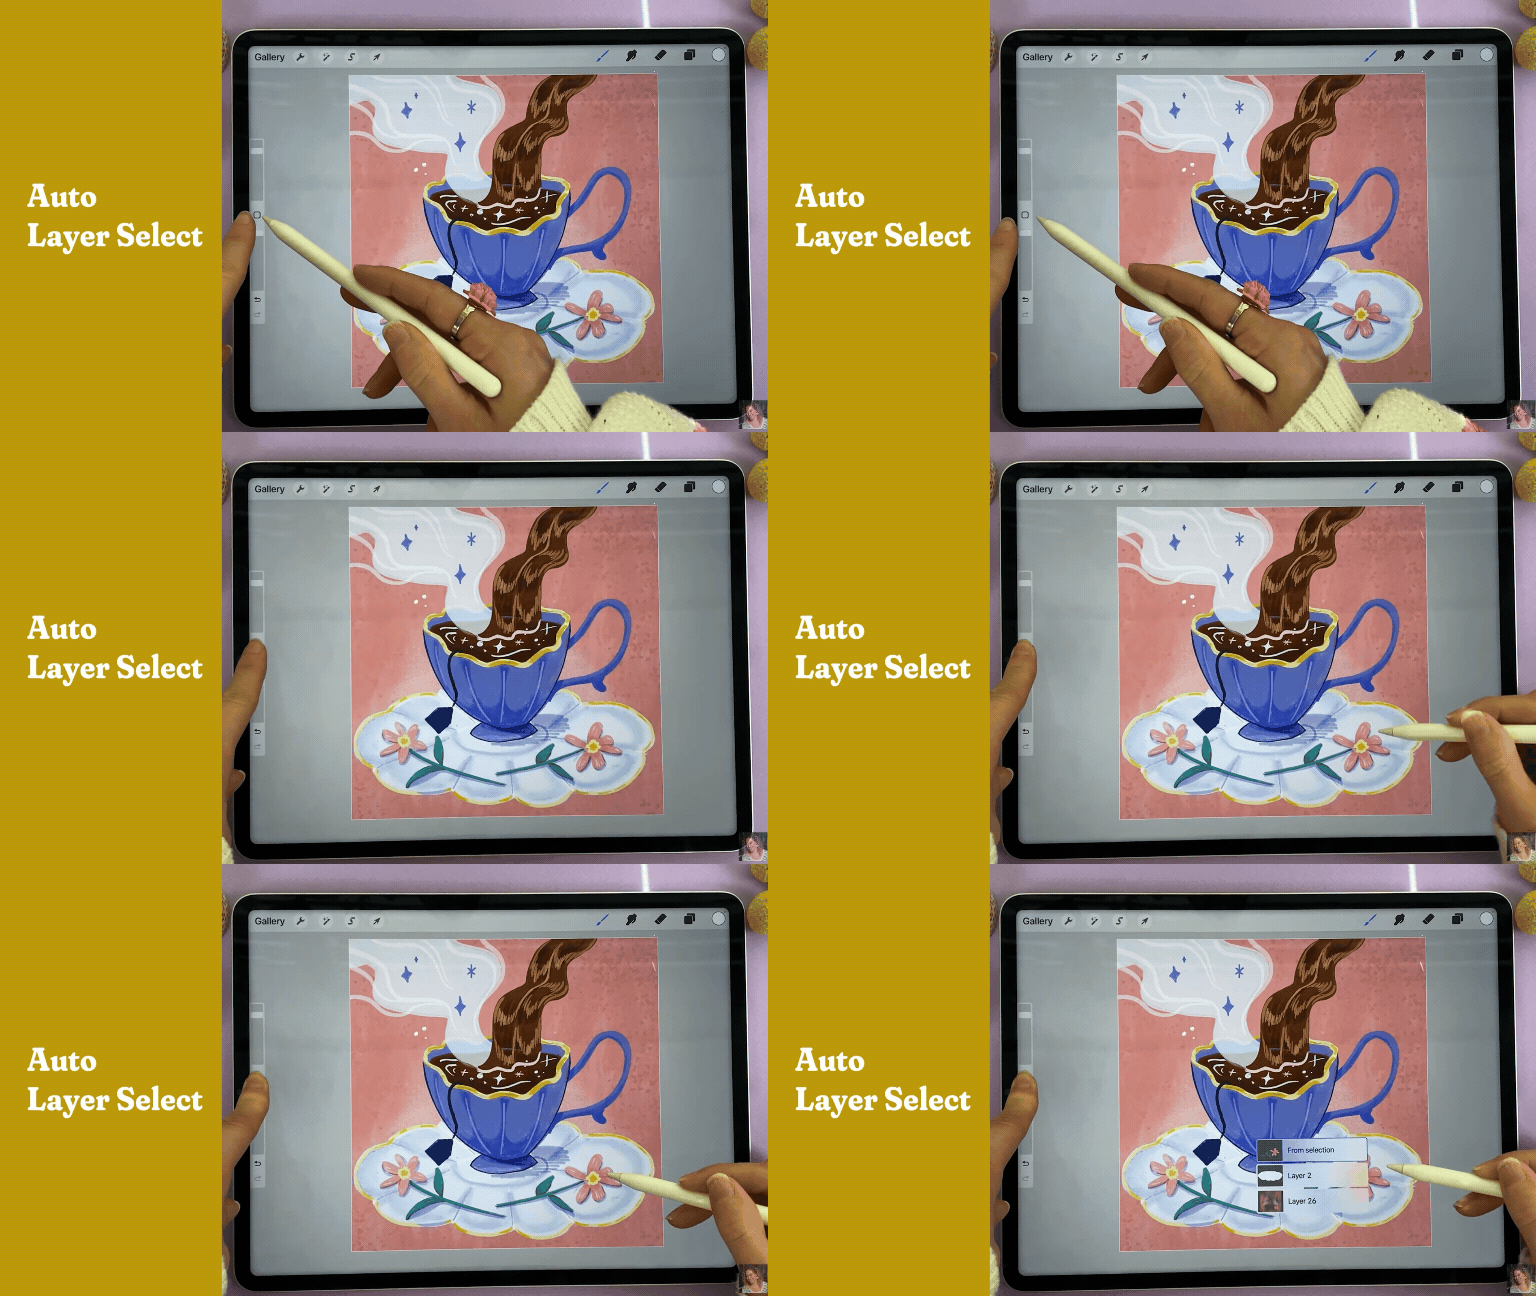
Auto Layer Select
Working with lots of layers can get confusing. But there’s a quick way to find and work on layers in your illustration without scrolling through the layers bar and checking and unchecking the layer visibility.
Enable Layer Select by:
Tapping the Wrench Icon → Preferences → Gesture Controls → Layer Select → Choose Which Shortcut to use!
I used to use the Square + Apple Pencil gesture. BUT as of June 2024, Procreate came out with an update that allows you to select the Apple Pencil Squeeze as an option if you have an Apple Pencil Pro. This is a game changer for my workflow!
Once you have this enabled, all you have to do is complete the action for the shortcut you chose. Then, Procreate will show you the exact layers in the area where I’ve tapped your pencil. You can choose the layer you want to work on, and Procreate will automatically select that layer for you. This is super helpful for identifying layers and shifting between them quickly!
Important Note: You MUST manually set this up in your gesture controls. This gesture won’t work unless it’s enabled.
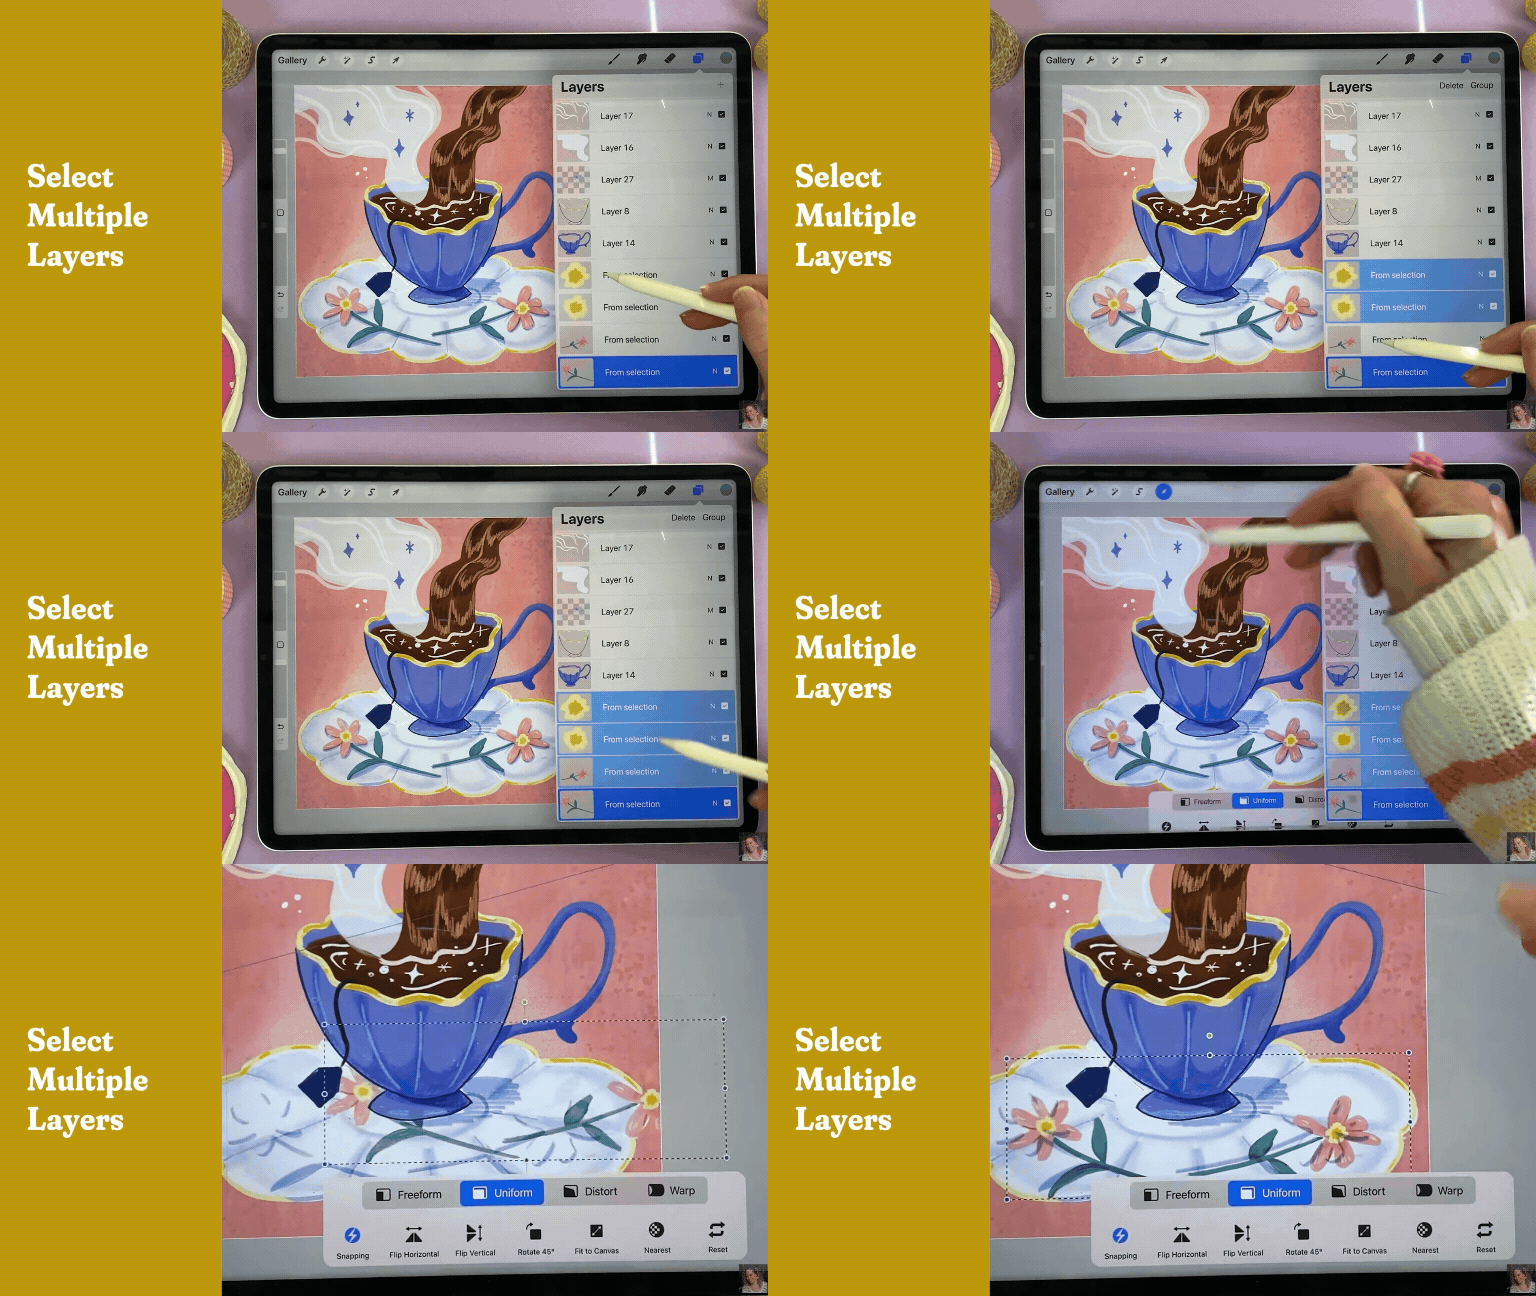
Select Multiple Layers
To select multiple layers at a time, navigate to the layers panel and swipe right on the layers you want to select.
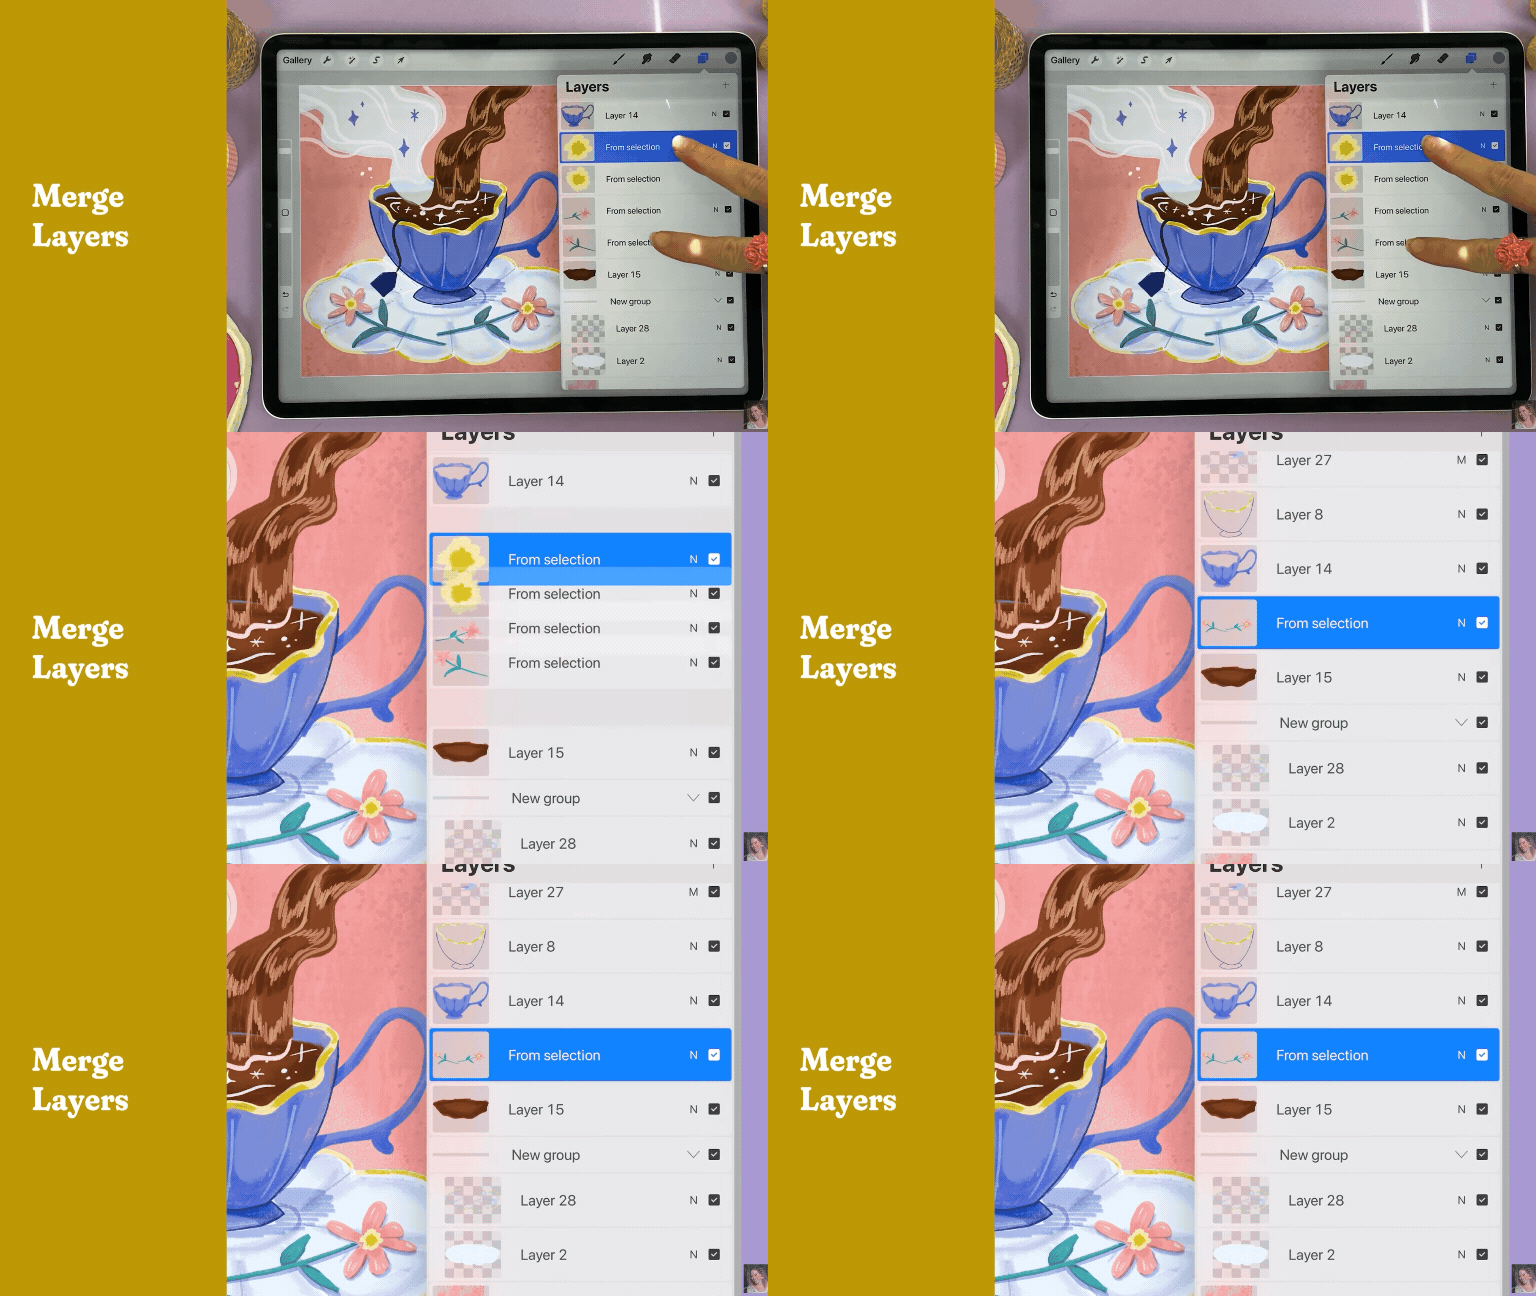
Merge Layers
Merge multiple layers into one by taking two fingers and pinching the layers together.
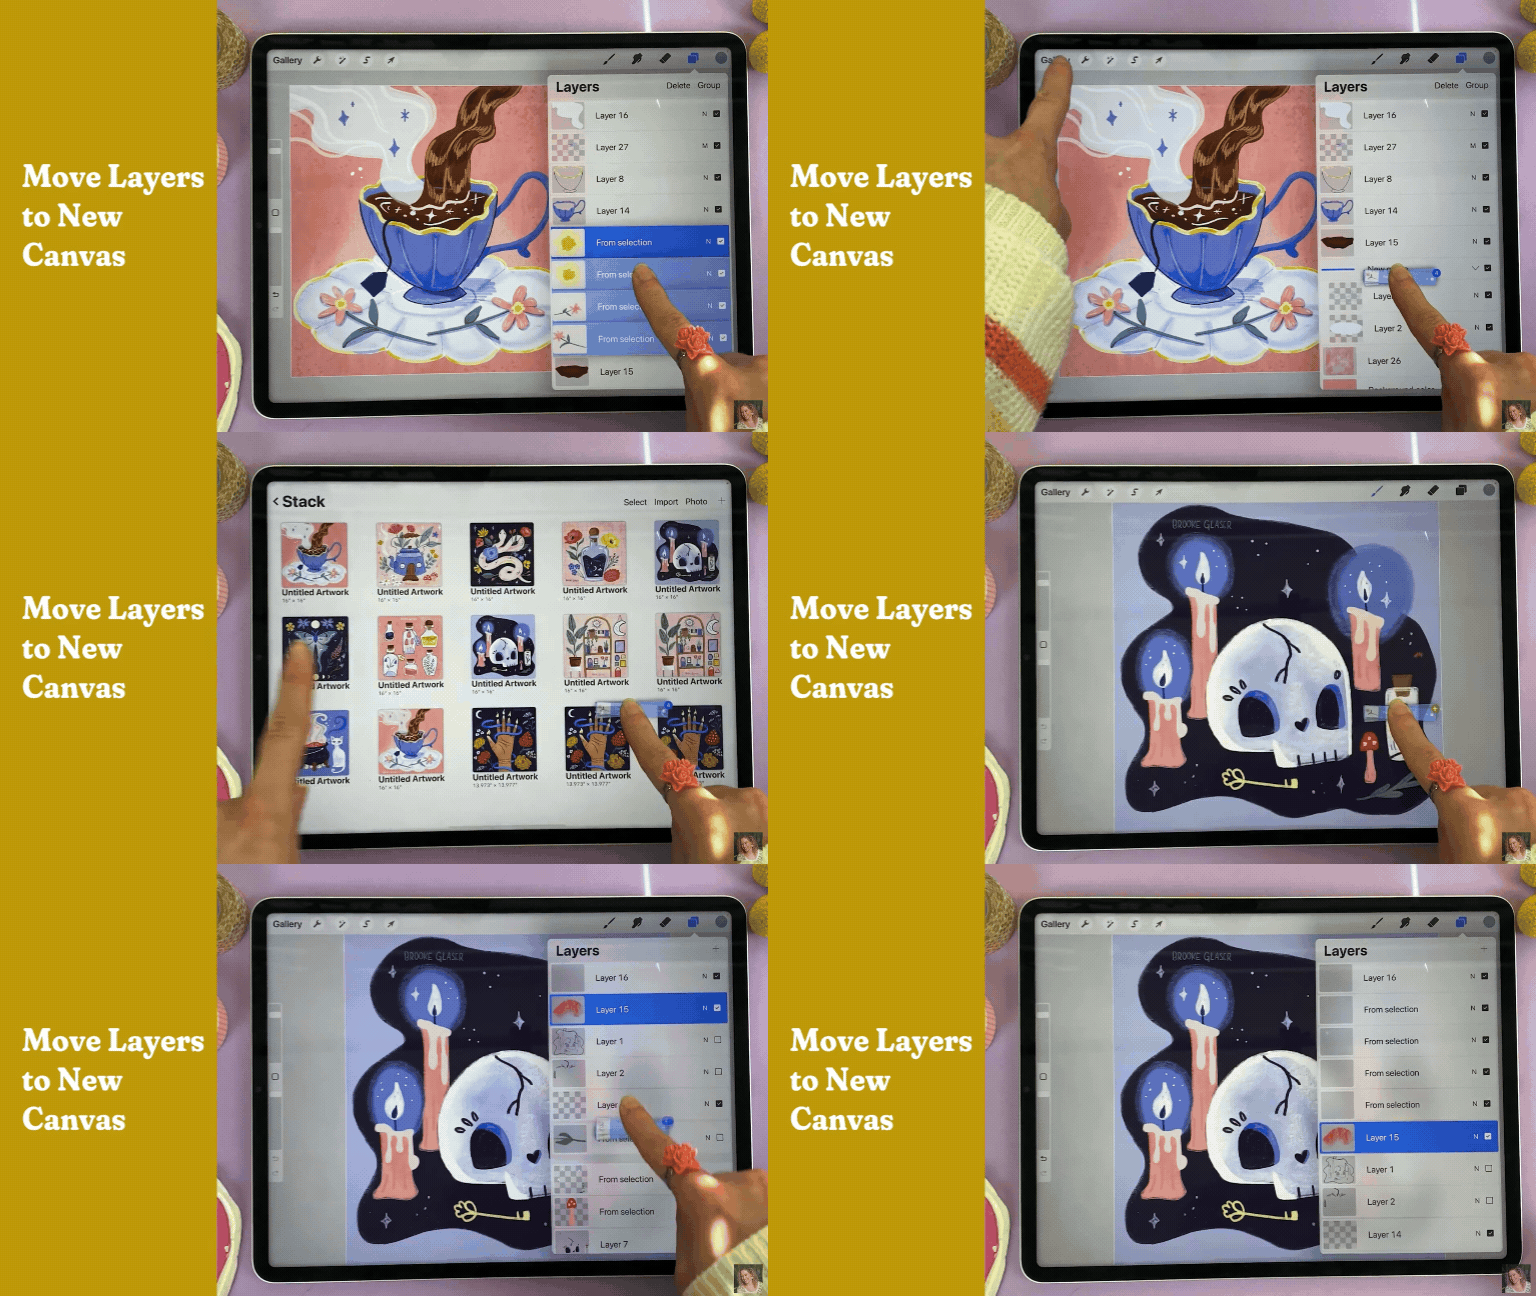
Move Layers to a New Canvas
If you want to move layers to a different canvas, select all the layers by swiping right. Then tap and hold on the selected layers, navigate to your gallery, select the canvas you want to add them to, open the layers panel, and drop in the layers.
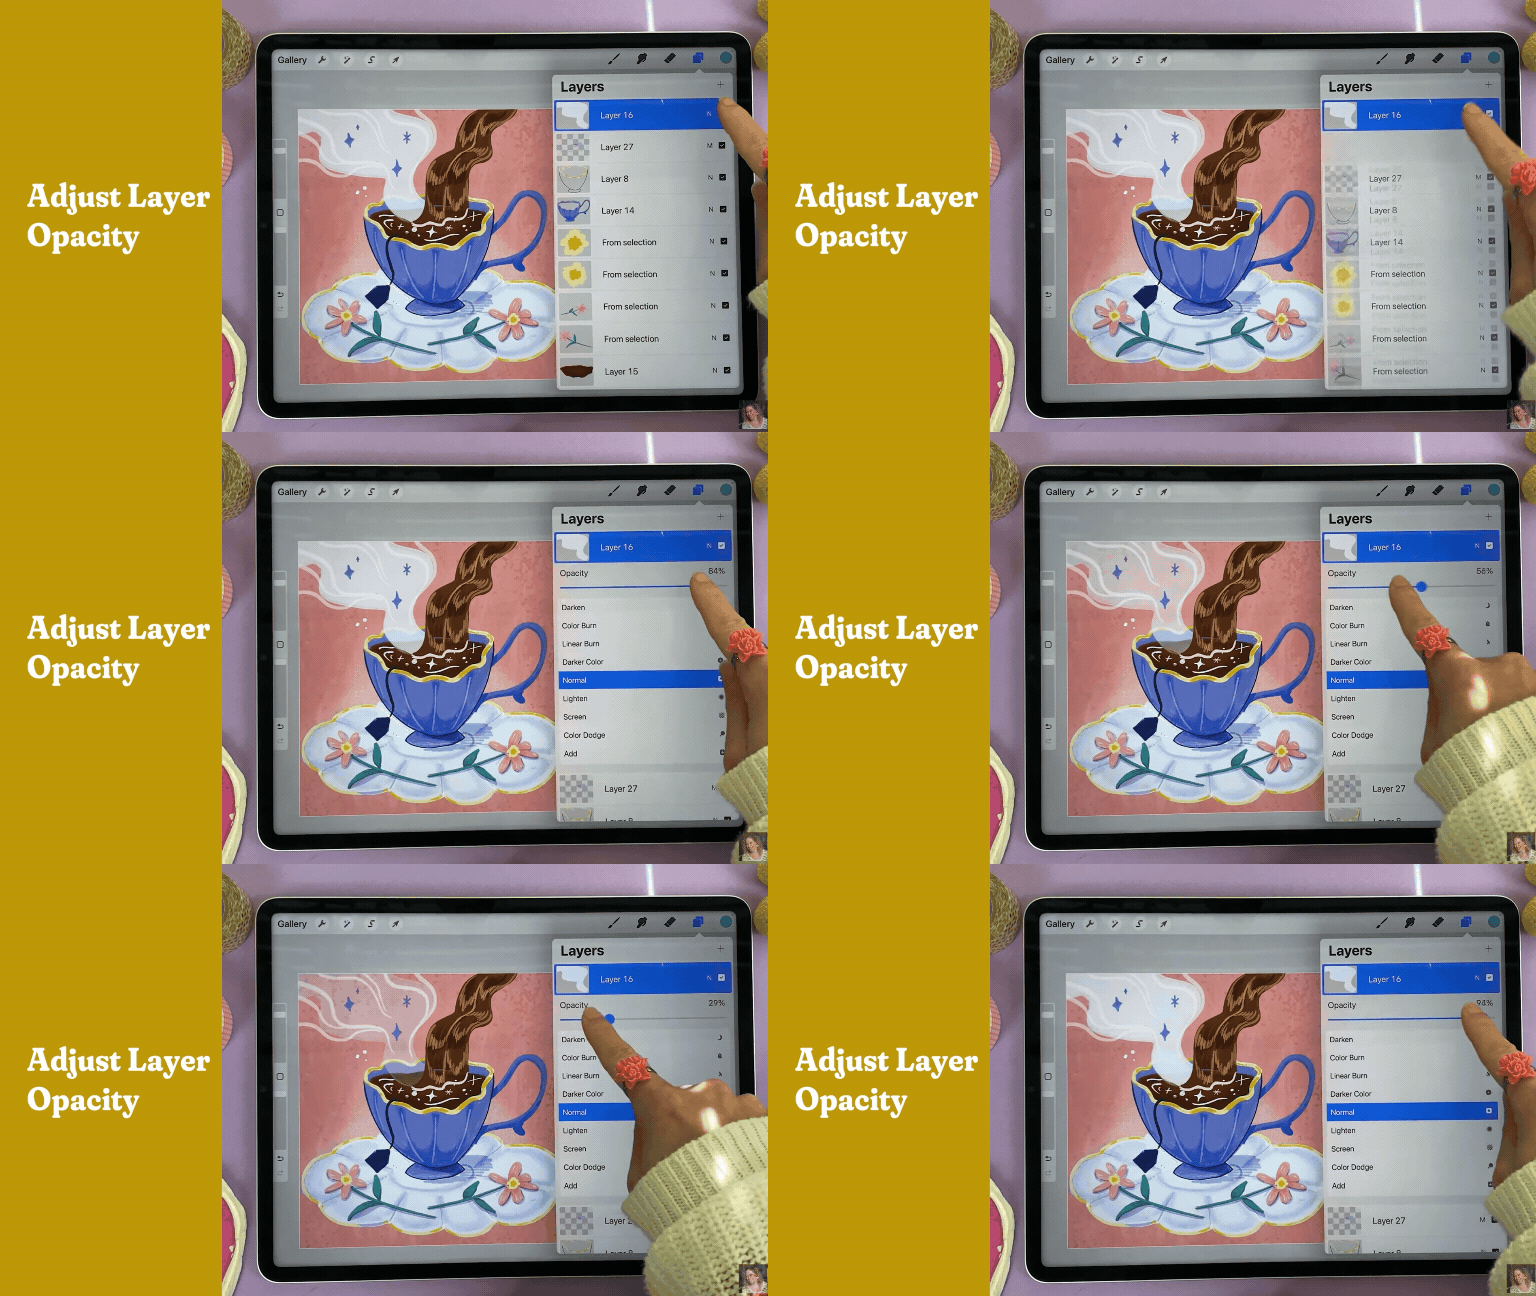
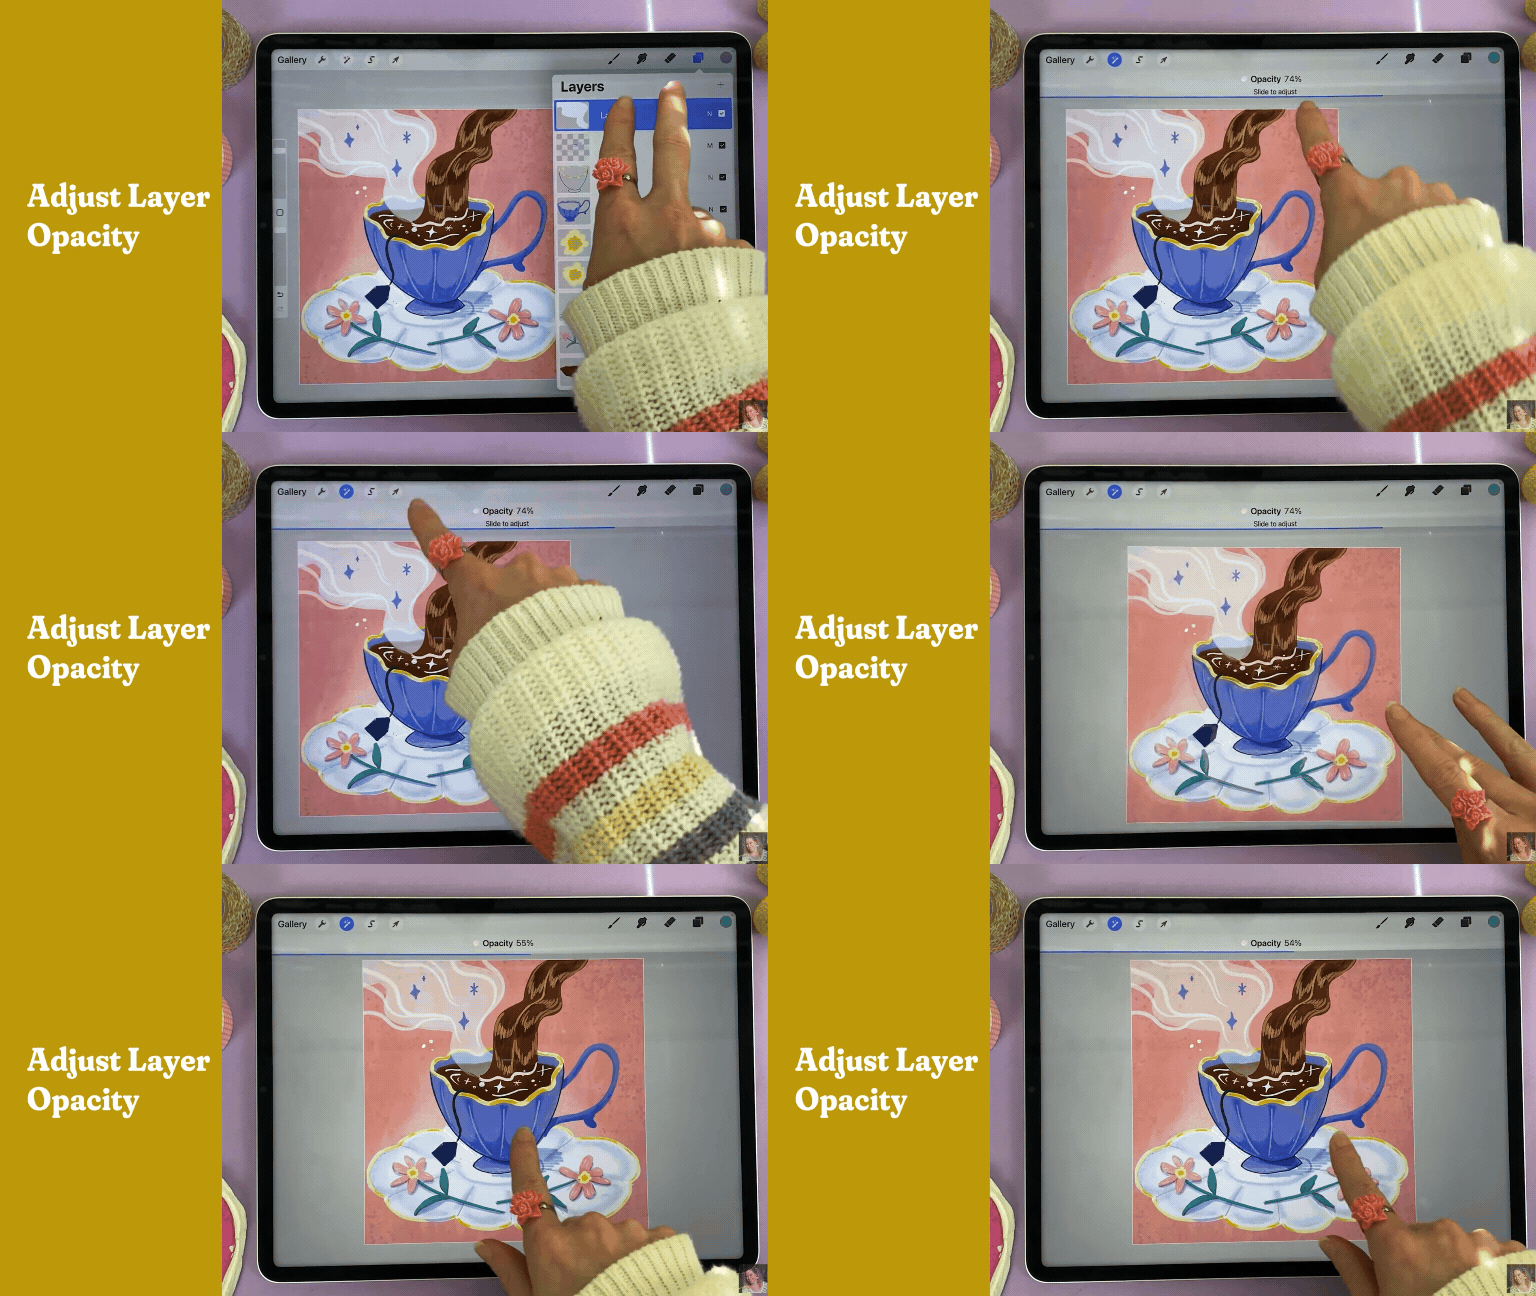
Adjust the Opacity of a Layer
You have two options when adjusting layer opacity.
Option 1: Navigate to the layers panel, tap “N”, and adjust the opacity slide.
Option 2: Tap the layer with two fingers. This opens the opacity slider on the canvas. You can scrub your finger from left to right to adjust the opacity from here.
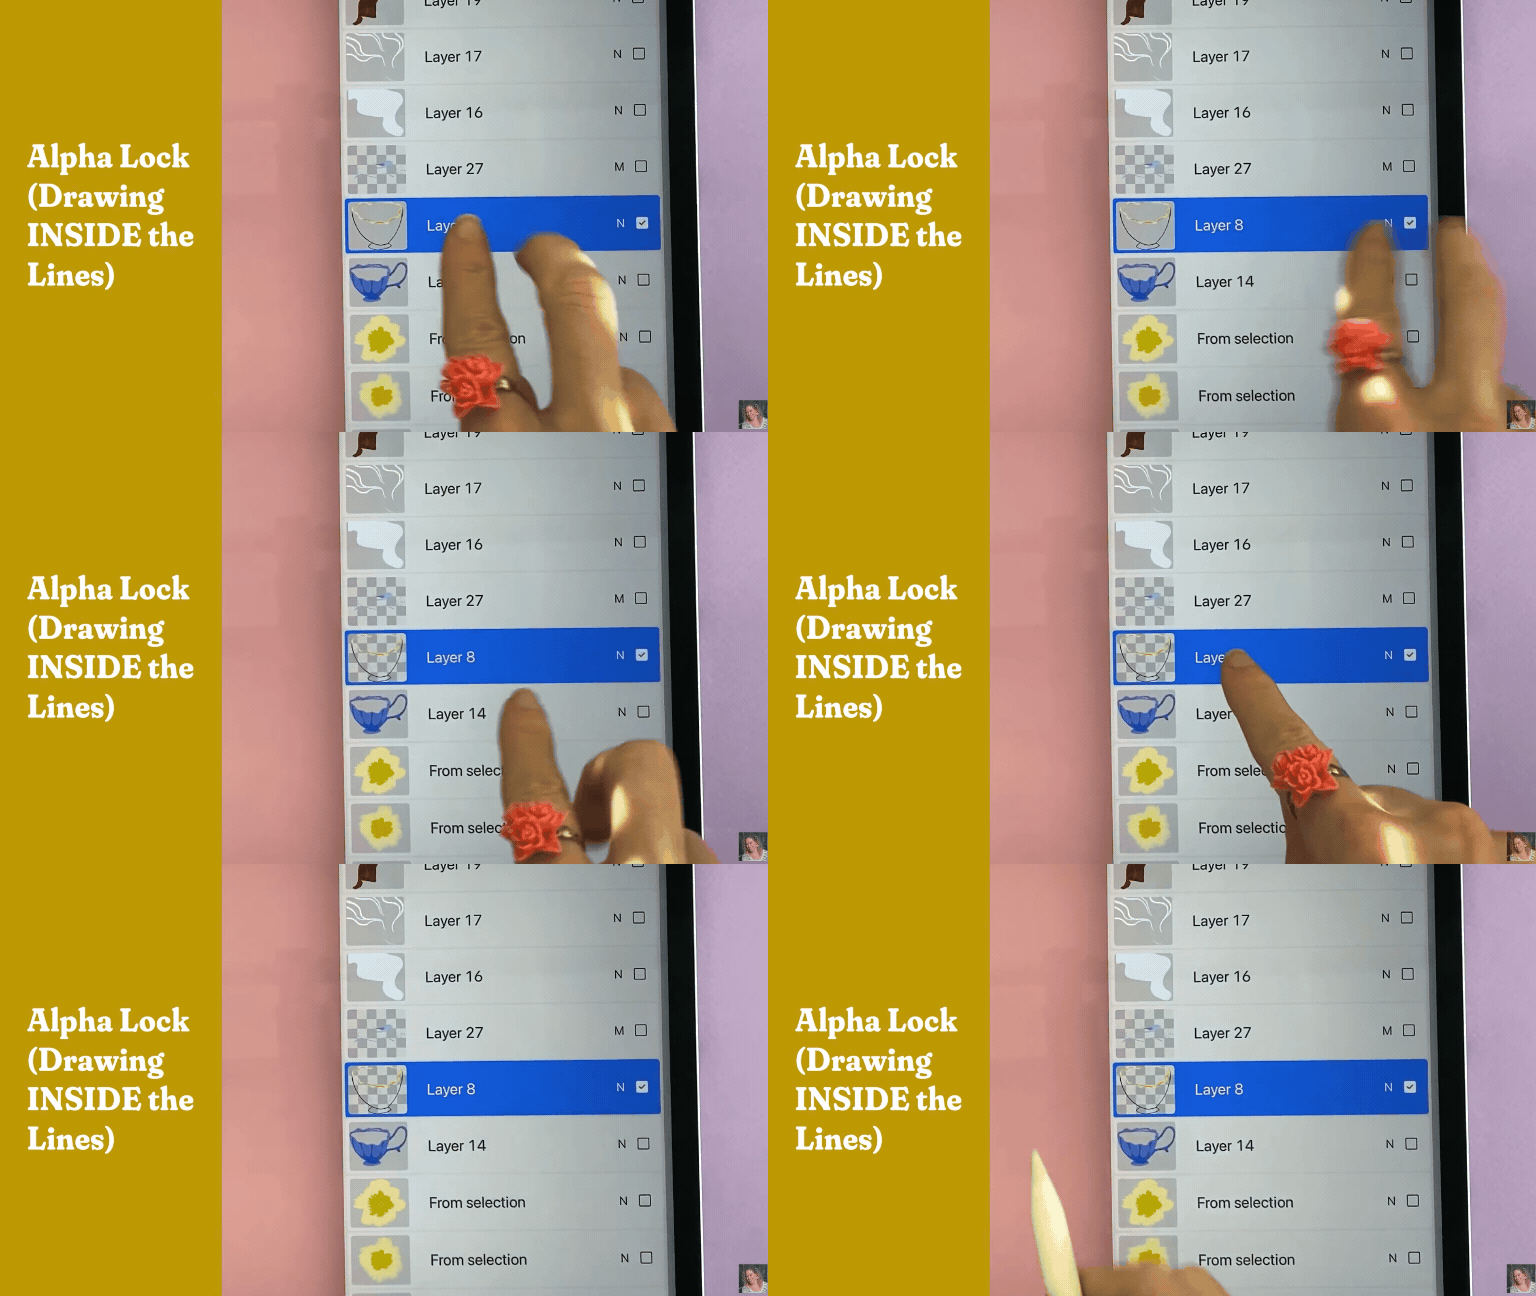
Alpha Lock (Automatically Draw Inside the Lines)
Enabling Alpha Lock ensures that you only draw within the boundaries of the layer you’ve selected. To enable it, tap the layer thumbnail image and select alpha lock. Or you can take two fingers and swipe right on the layer to automatically enable it.
You’ll be able to tell that Alpha Lock is on because your layer thumbnail image will have a gray checkered background.
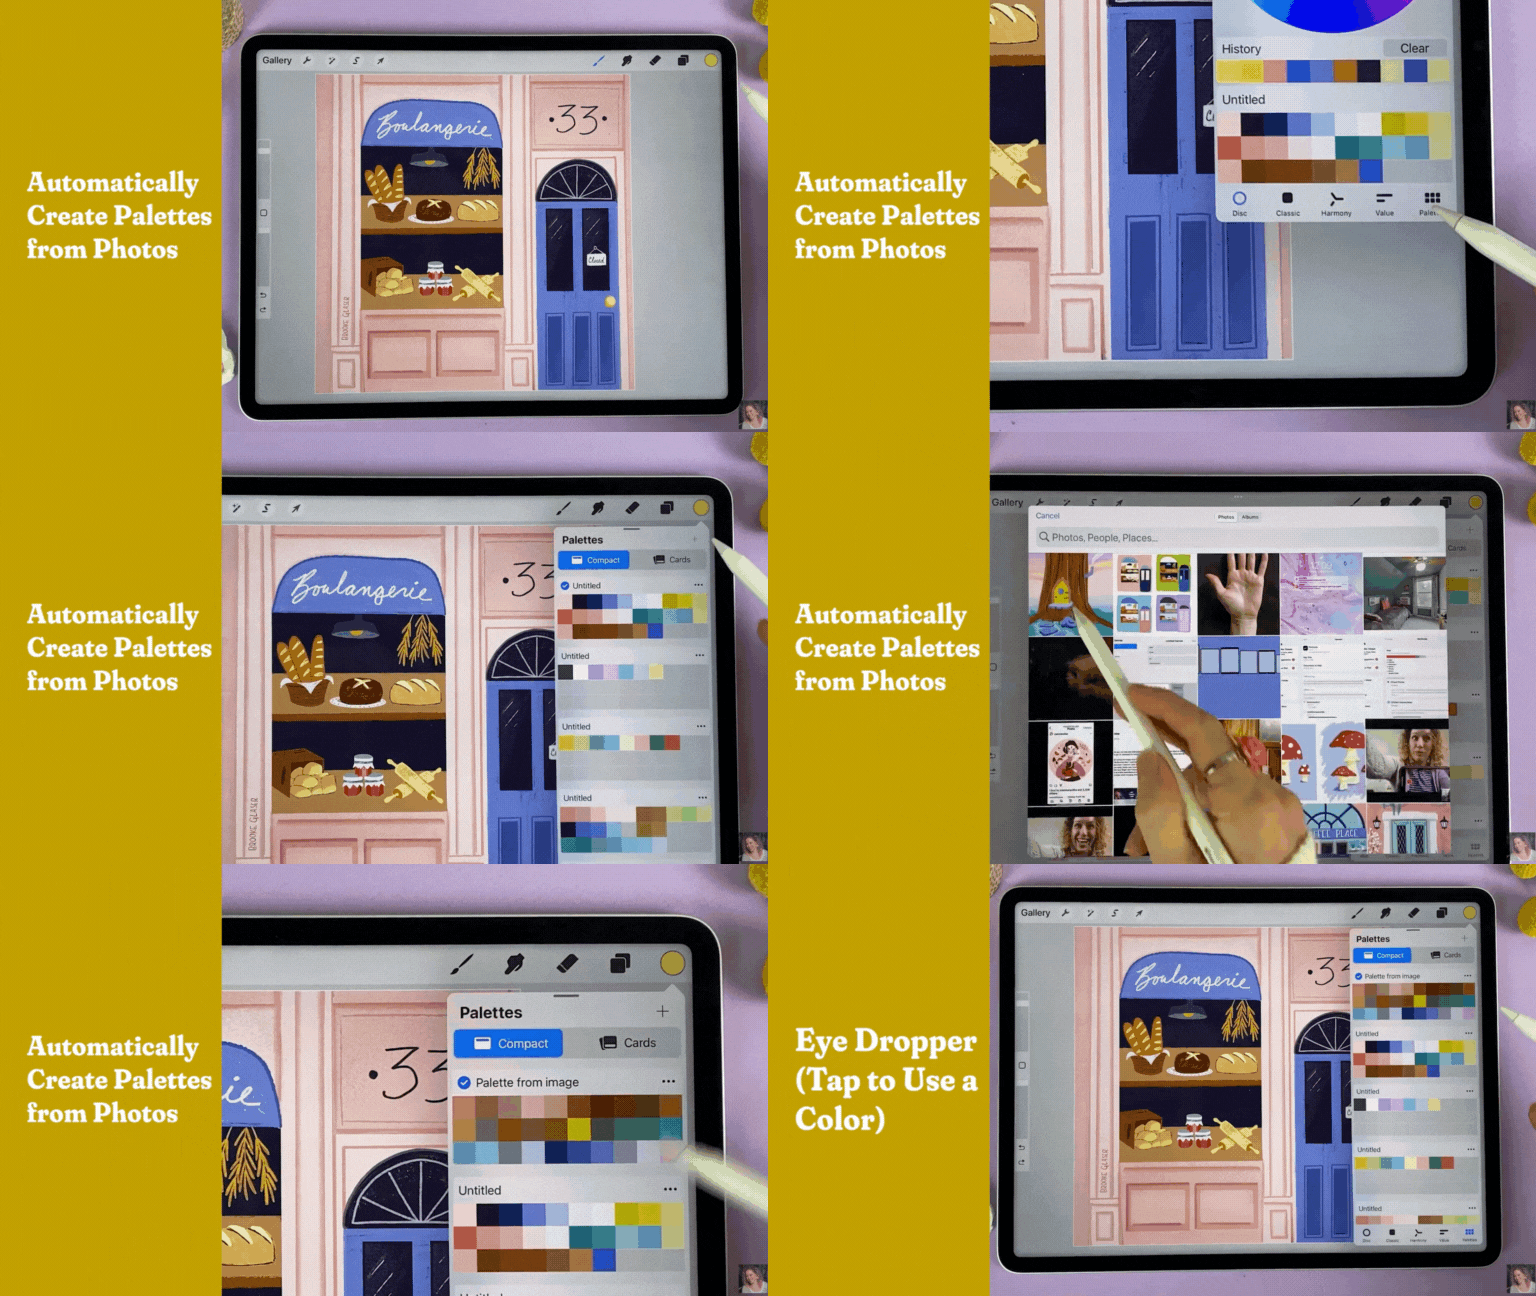
Automatically Create Color Palettes from Photos
Procreate can automatically create a color palette from you. To do this, select the color icon, choose the “Palettes” tab at the bottom, tap the plus icon at the top, and choose “New From Photos”. Select the photo you want to use, and Procreate will automatically generate a palette for you!
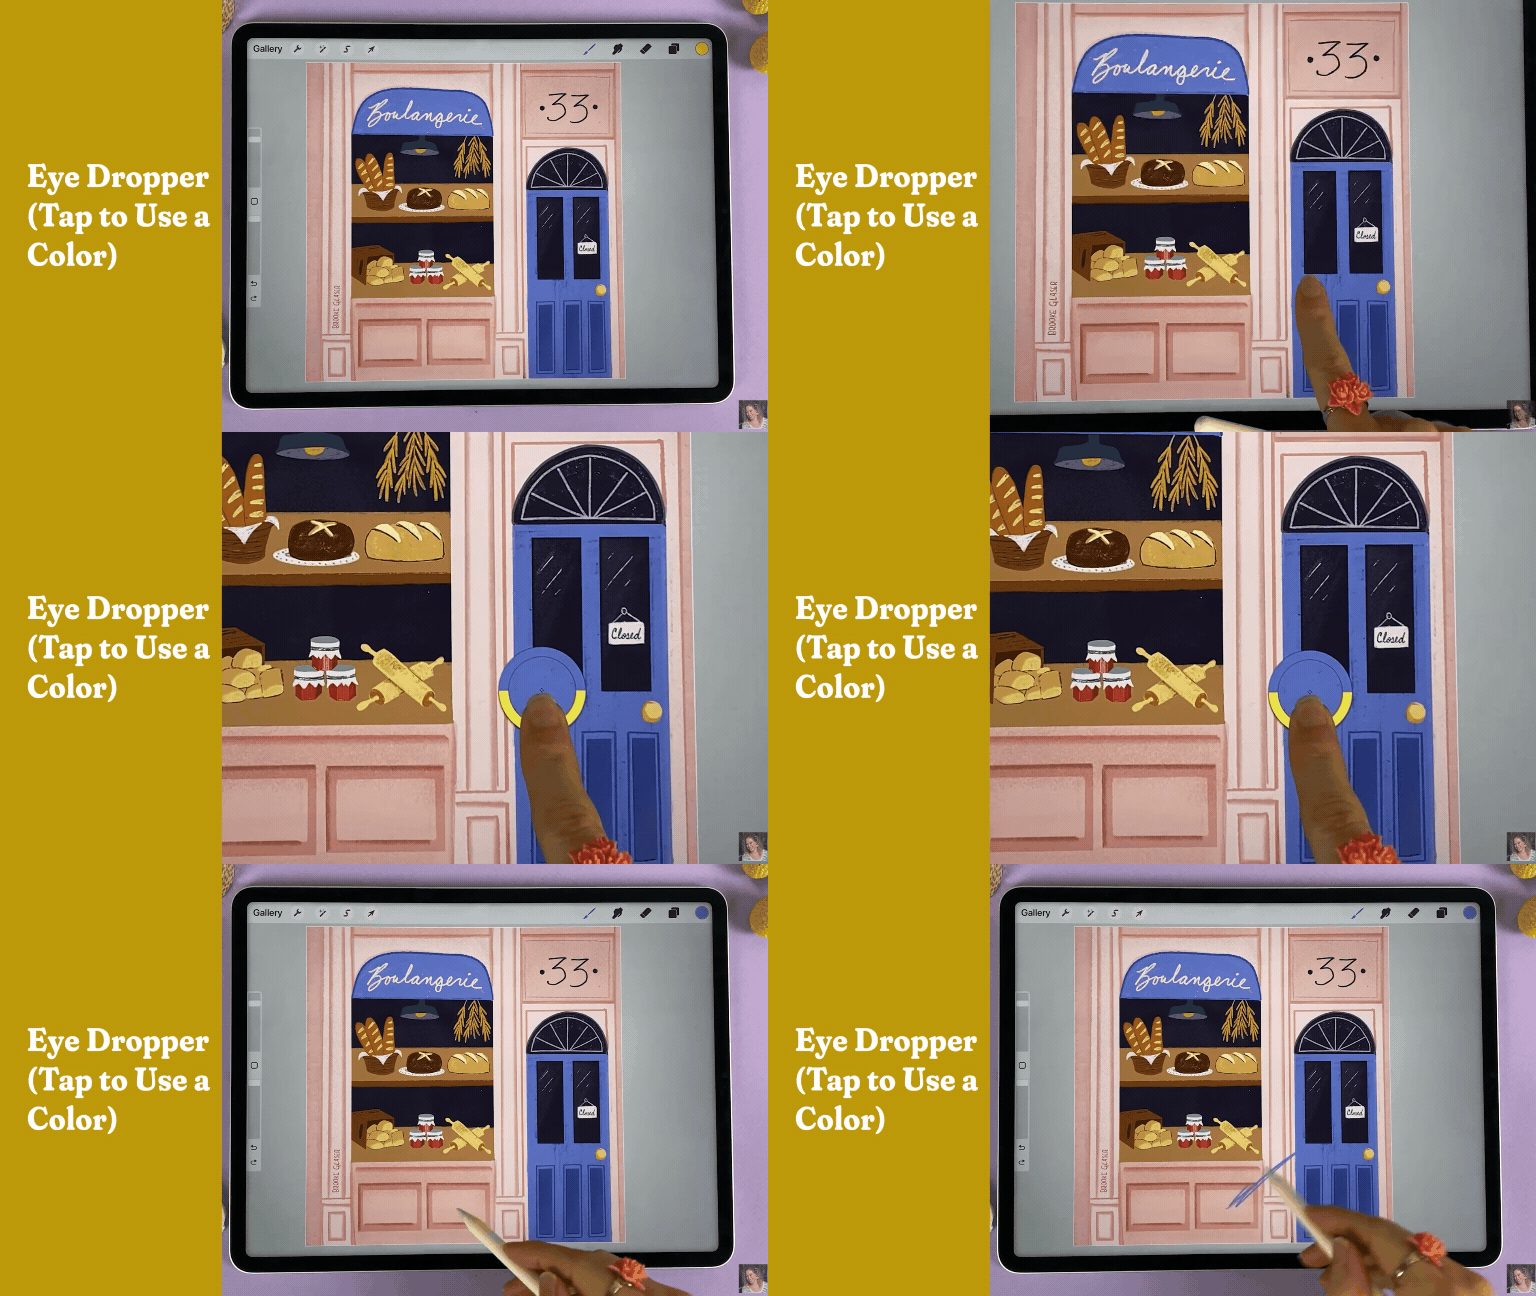
Choose Colors with the Eyedropper Tool
If you want to easily select colors from the piece you’re working on, tap and hold the screen with one finger. Procreate will select the color you’ve tapped on and you can draw with it!
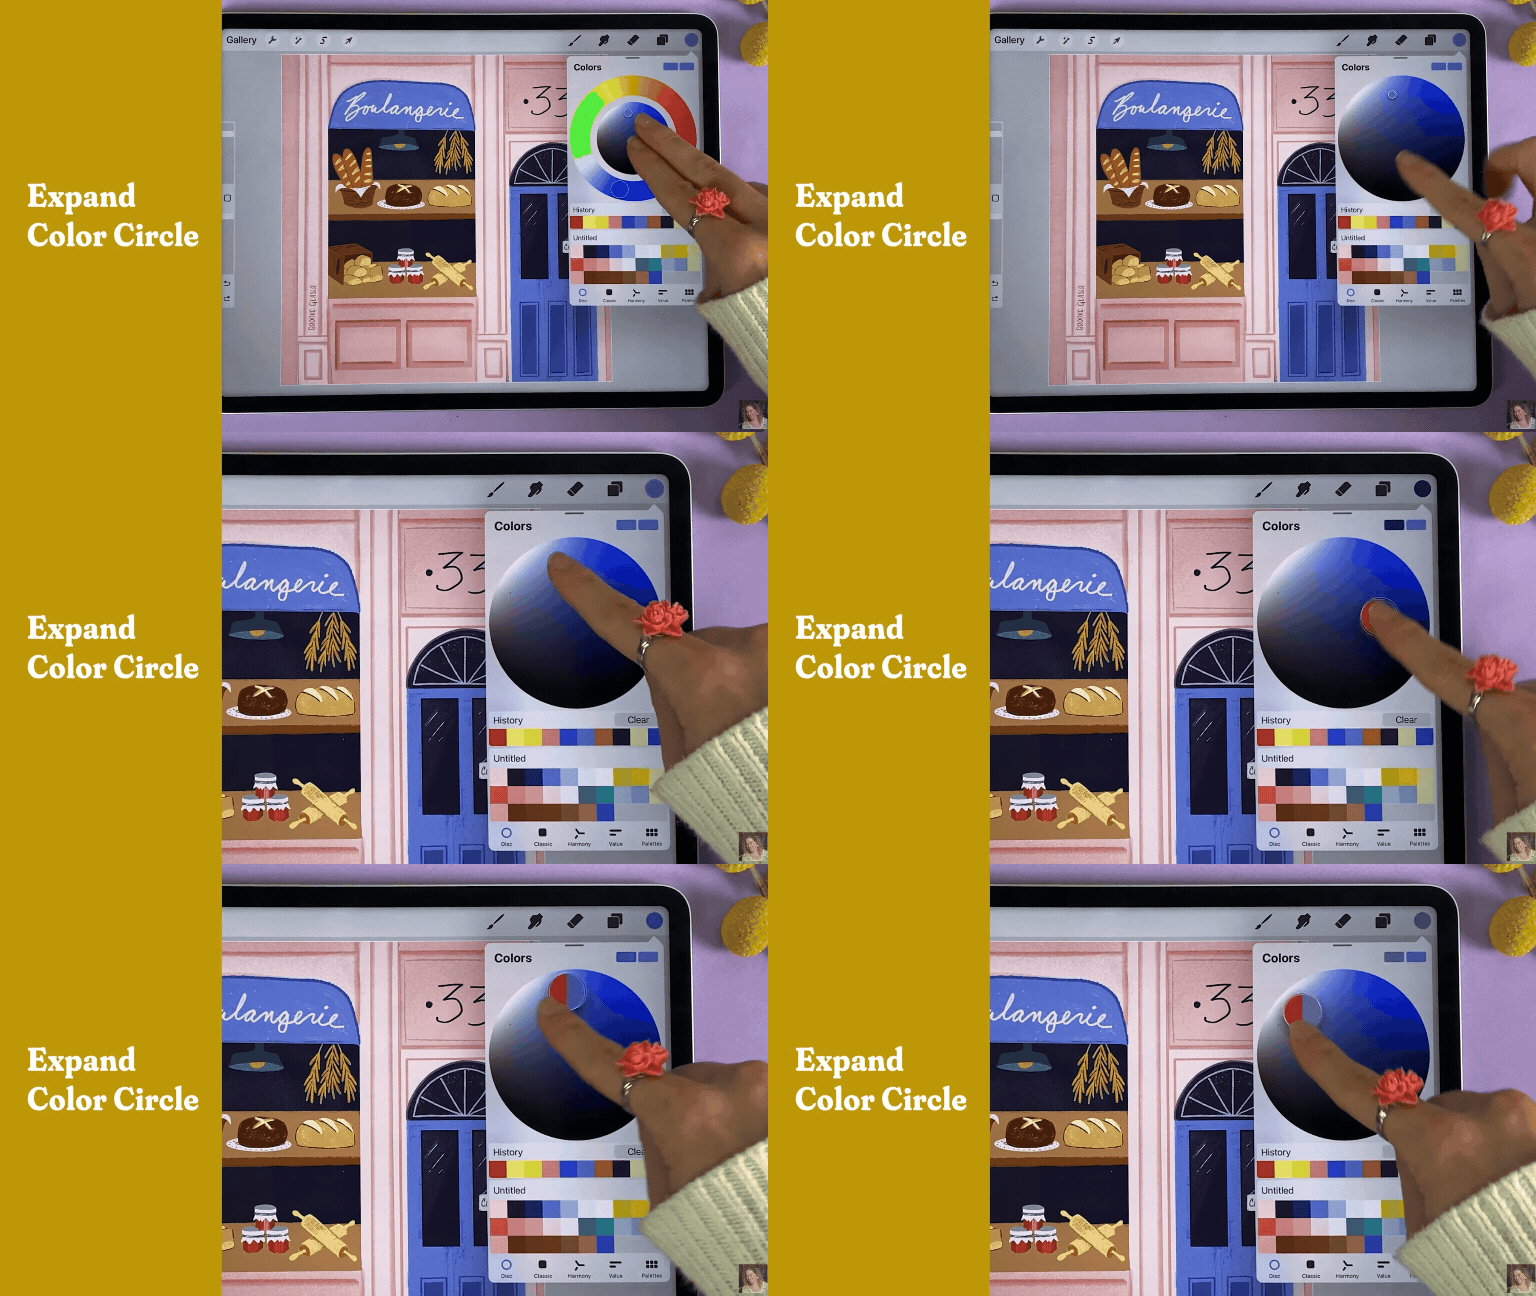
Expand the Color Disc
You can expand the color disc for better control of color choosing. Just take two fingers and expand them on the color disc in the color palette panel.
Bonus Tip: You can double tap on any area of the color circle to choose pure colors.
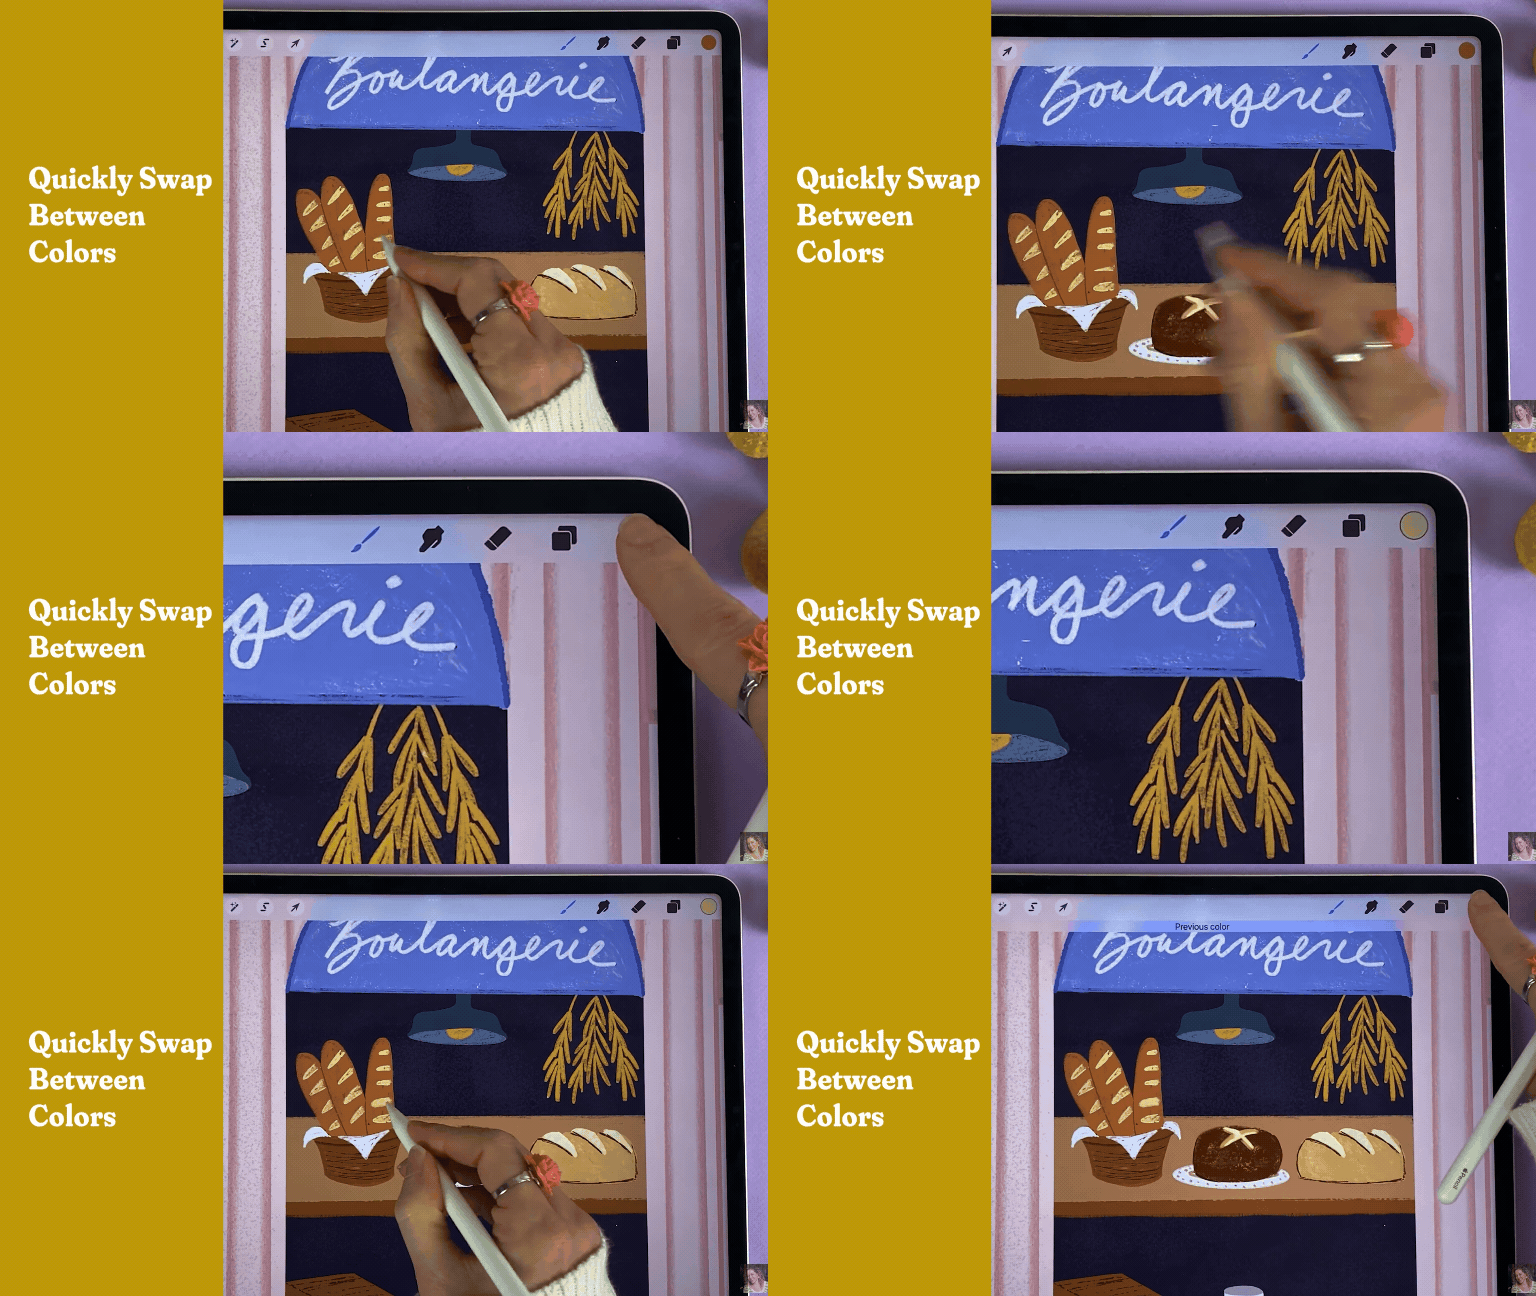
Quickly Swap Between Colors
Tap and hold on the color circle to quickly swap between the last two colors that you’ve used.
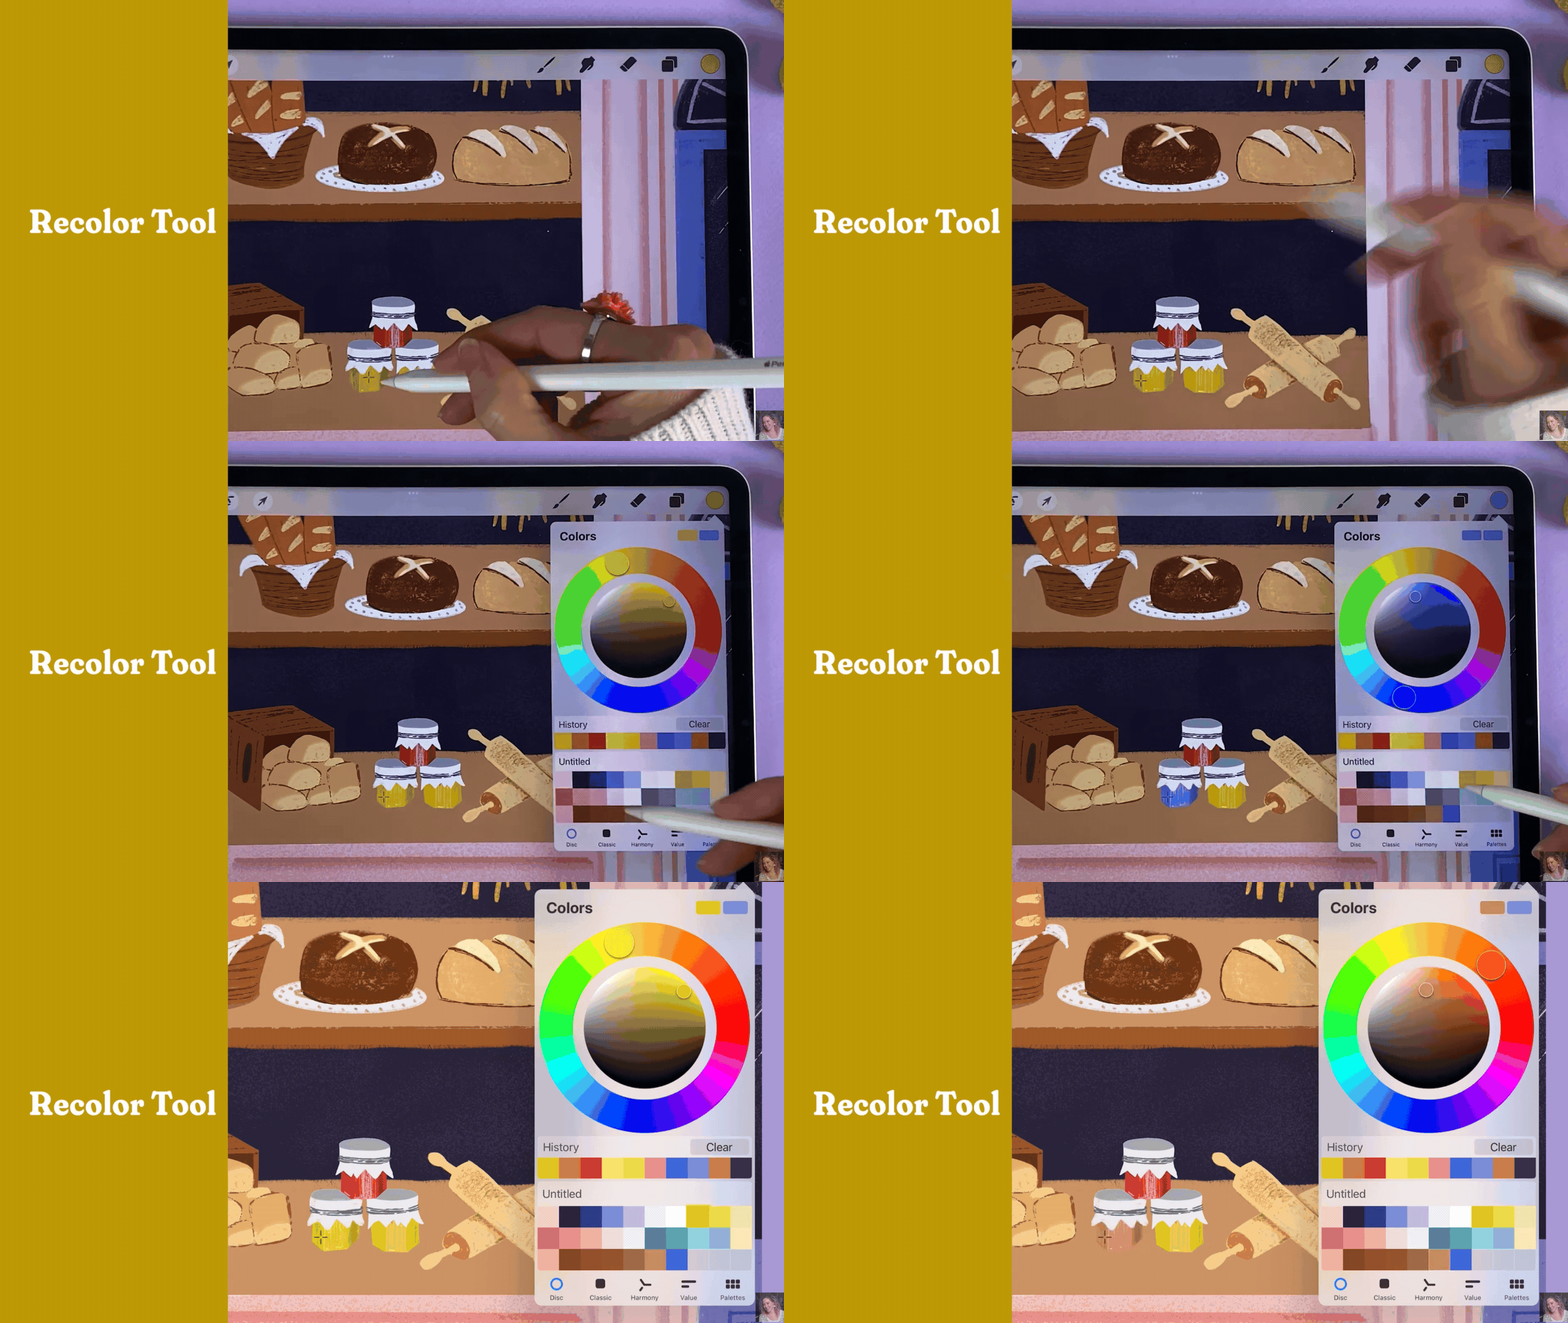
Recolor Tool
You can quickly change the color of different pieces of your illustration with the recolor tool.
Drag and drop the color you want to change and tap “Continue filling with recolor”. Drag the cross hatch onto the area you want to recolor. You can open the color palette panel to explore different color options. You can tap in a new area to make new color changes.
To activate the Recolor tool, tap the Wrench Icon → Preferences Tab → Gestures controls → Quick Menu.
Choose which shortcut you want to use to activate the Quick Menu. When you use that shortcut, it will pull up the quick menu on your canvas. Tap and hold one of the rectangles on the Quick Menu, and select Recolor.
Now, every time you activate the Quick Menu, you’ll be able to quickly access the Recolor Tool!
Selection Color Fill
You can add color to a selection by creating a selection using the ribbon icon on the top left corner of your screen.
Then select Color Fill on the selection menu, and when you complete your selection it will fill it with your selected color.
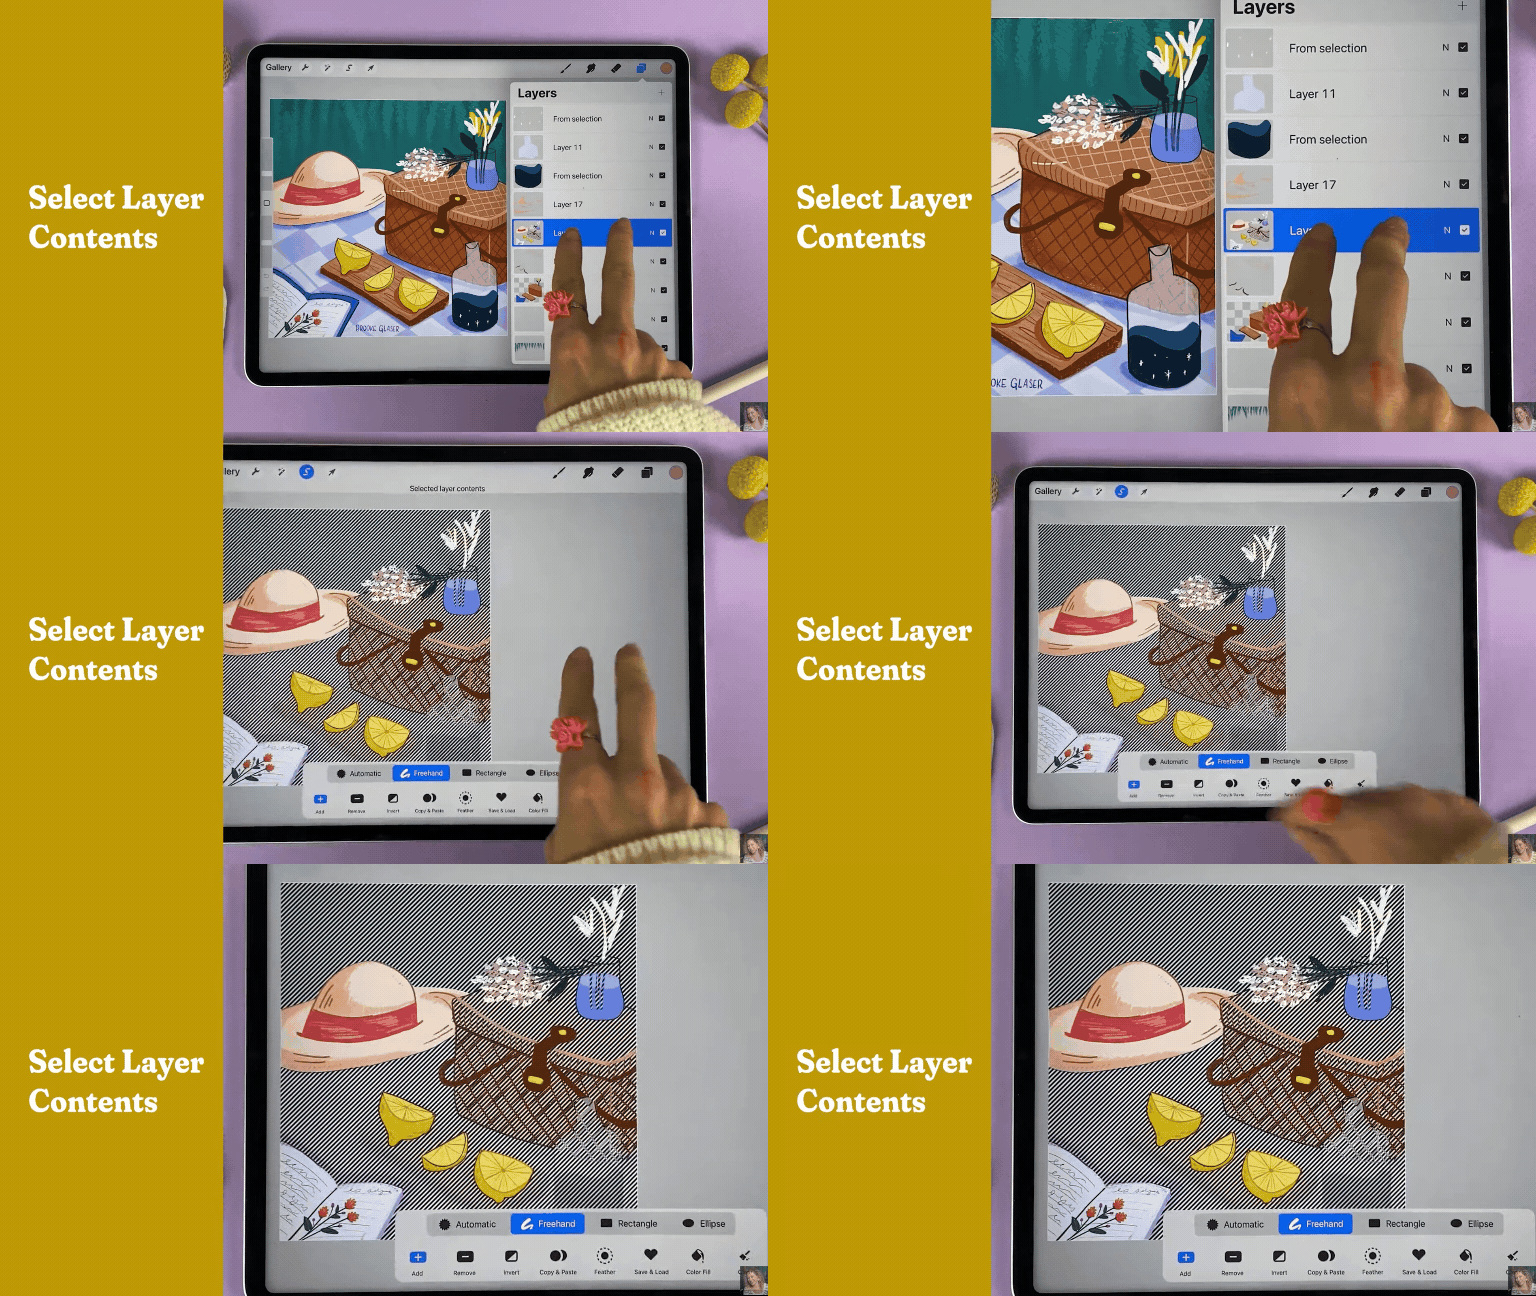
Layer Selection Tool
Want to quickly select everything on a layer? Tap and hold two fingers on the layer and it will automatically select everything.
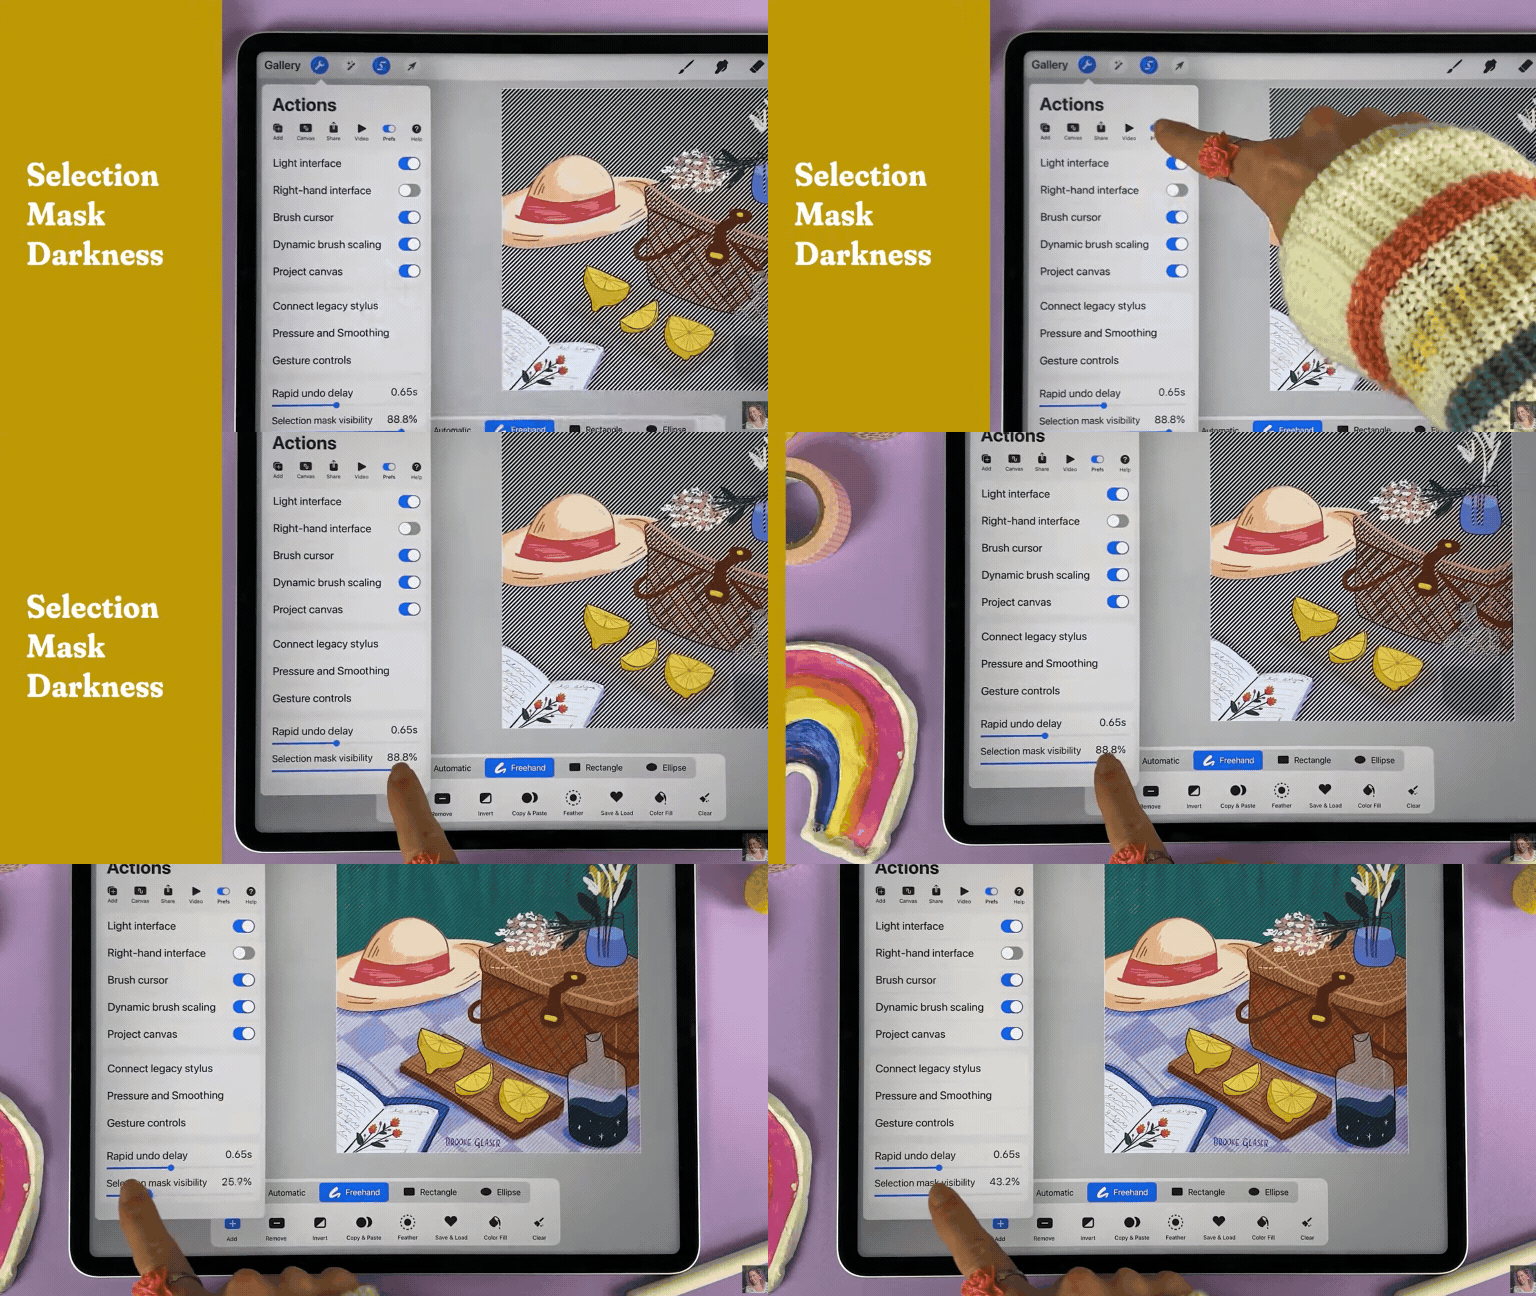
If you find that the selection bars are too distracting, you can turn down their opacity by:
Tapping the wrench icon → Preferences → Slide down the “Selection Mask Visibilithy” slider.
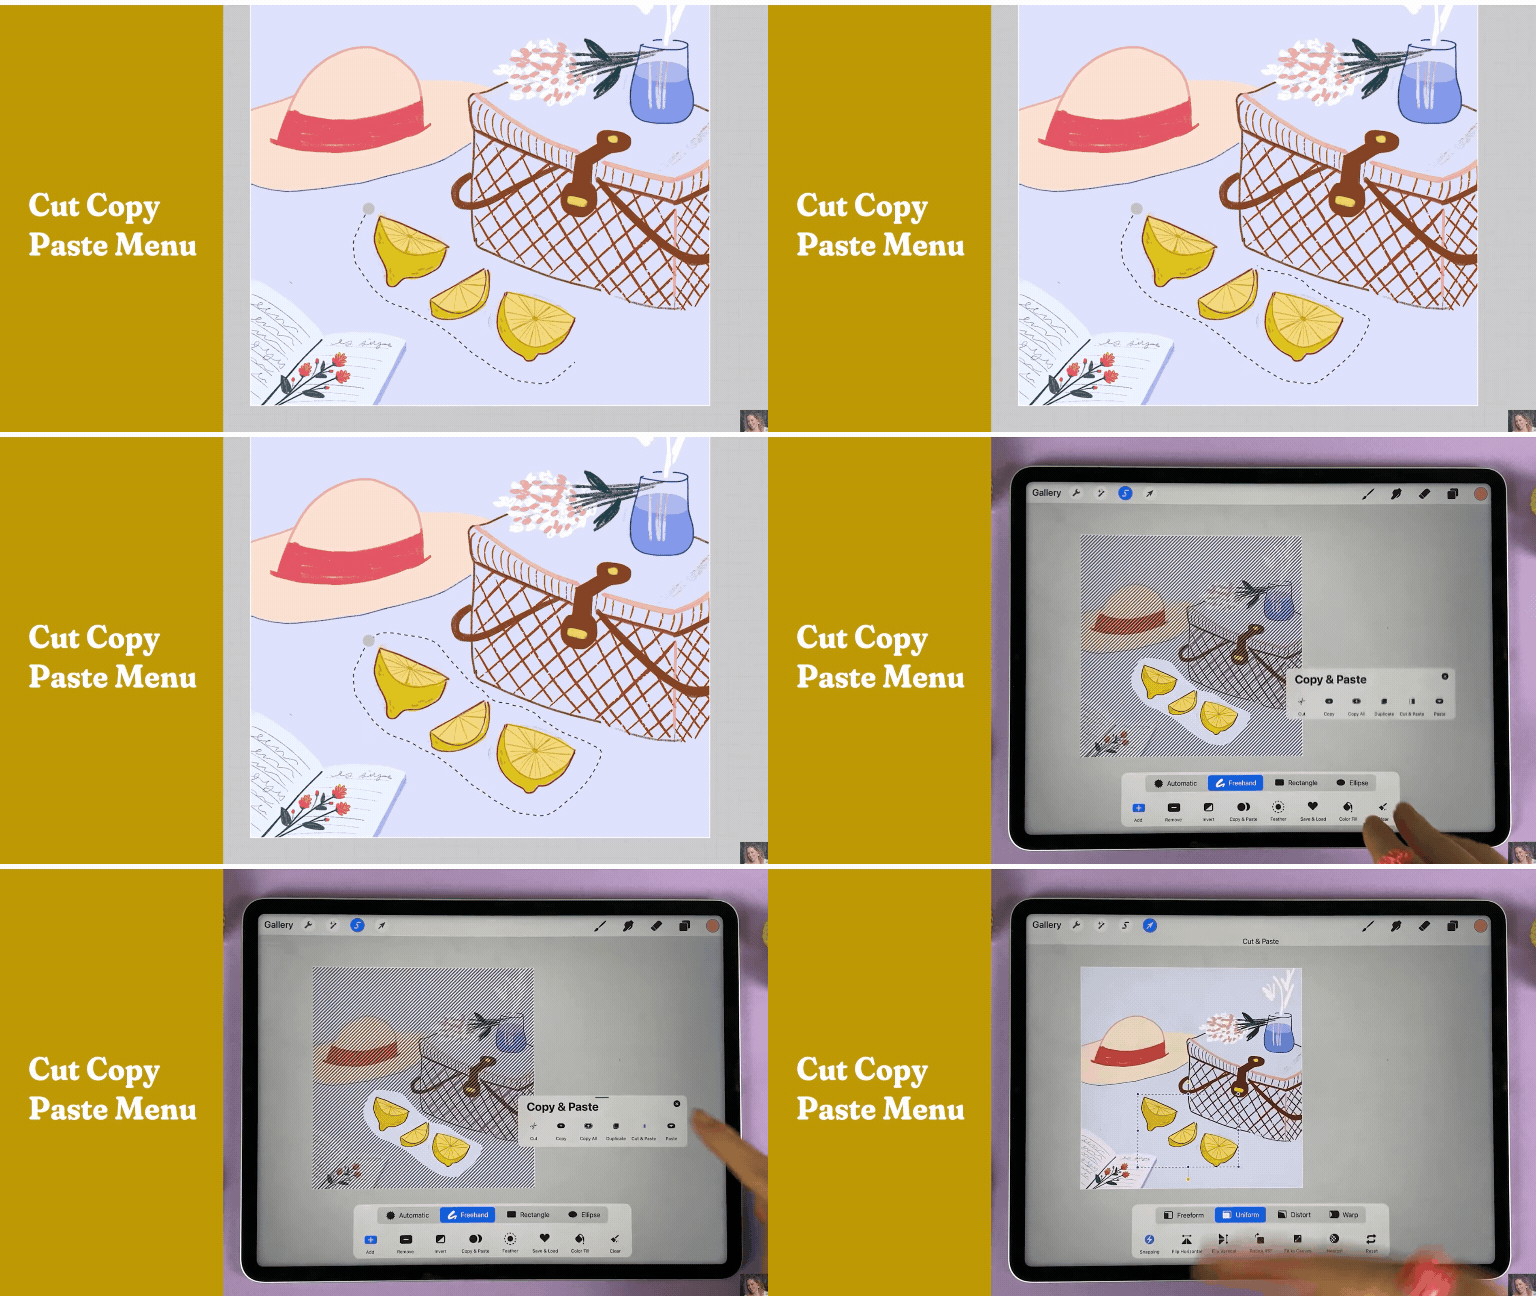
Cut, Copy, Paste Menu (Putting Objects on Their Own Layer)
If you want to isolate part of your illustration on its own layer, start by making a selection of the objects you want to isolate. Then swipe down with three fingers.
This opens the copy and paste menu. To remove something from its current layer and add it to a new layer, choose “Cut and Paste”. Now your selection will be on its own new layer!
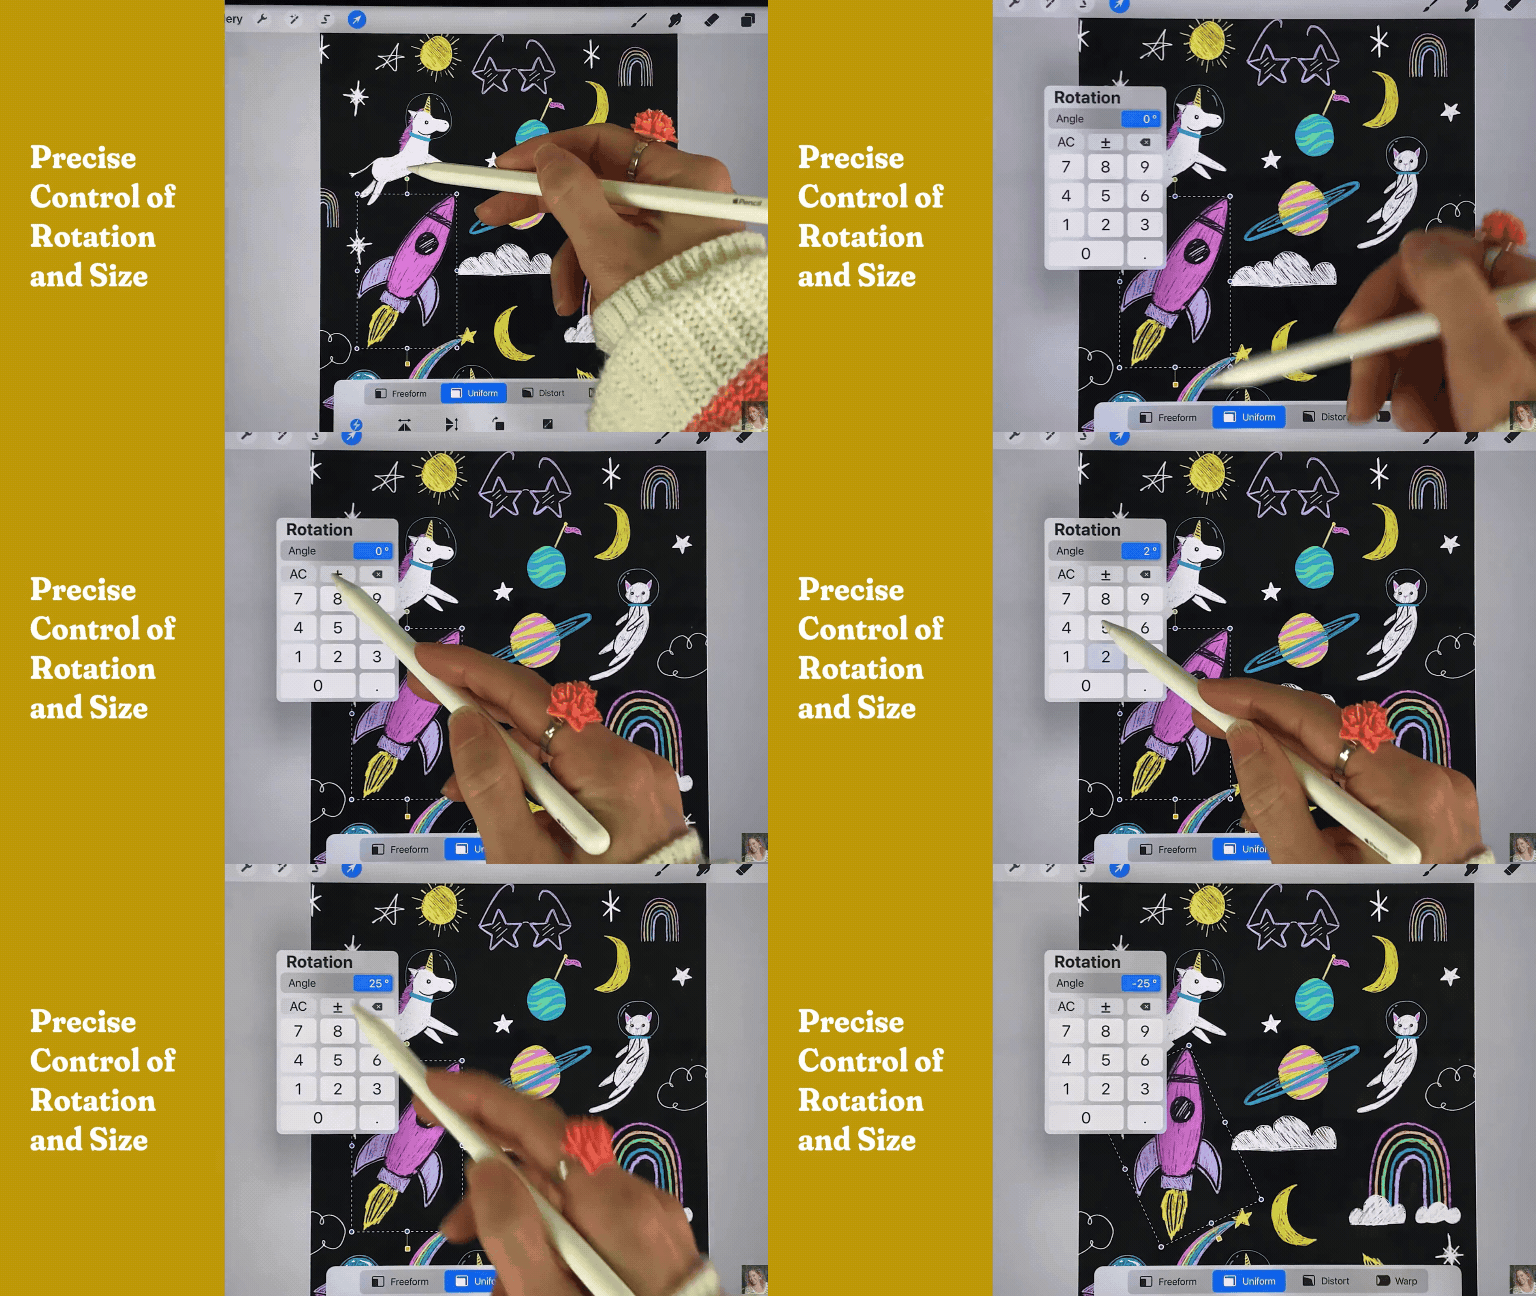
Precise Control of Rotation and Size
If you are working on a pattern or an illustration that requires lots of precision in how things are sized, you can control the exact rotation or size of an object easily.
With the object selected, tap the green rotation node and you’ll be able to adjust the exact rotation. If you tap one of the blue nodes around the bounding box, you can adjust the size of the object.
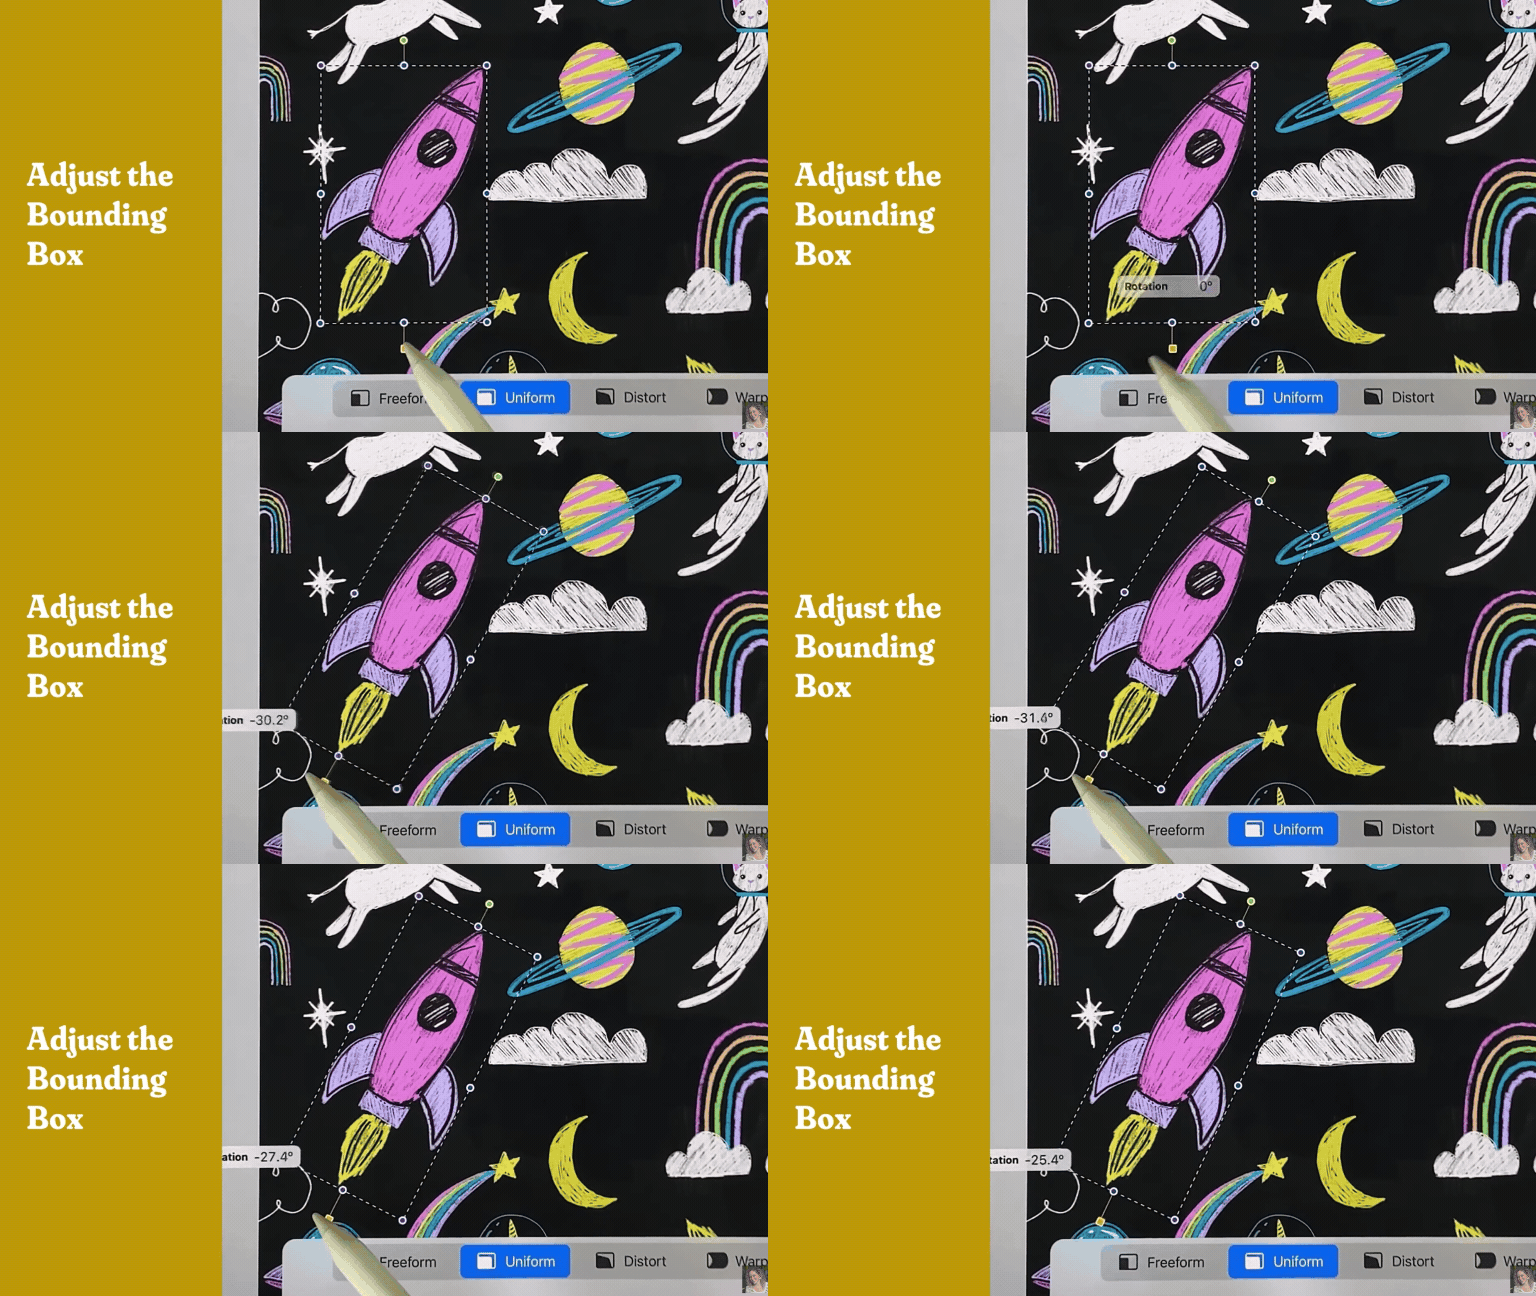
Adjust the Bounding Box
Drag the yellow square node to adjust the bounding box around an element.
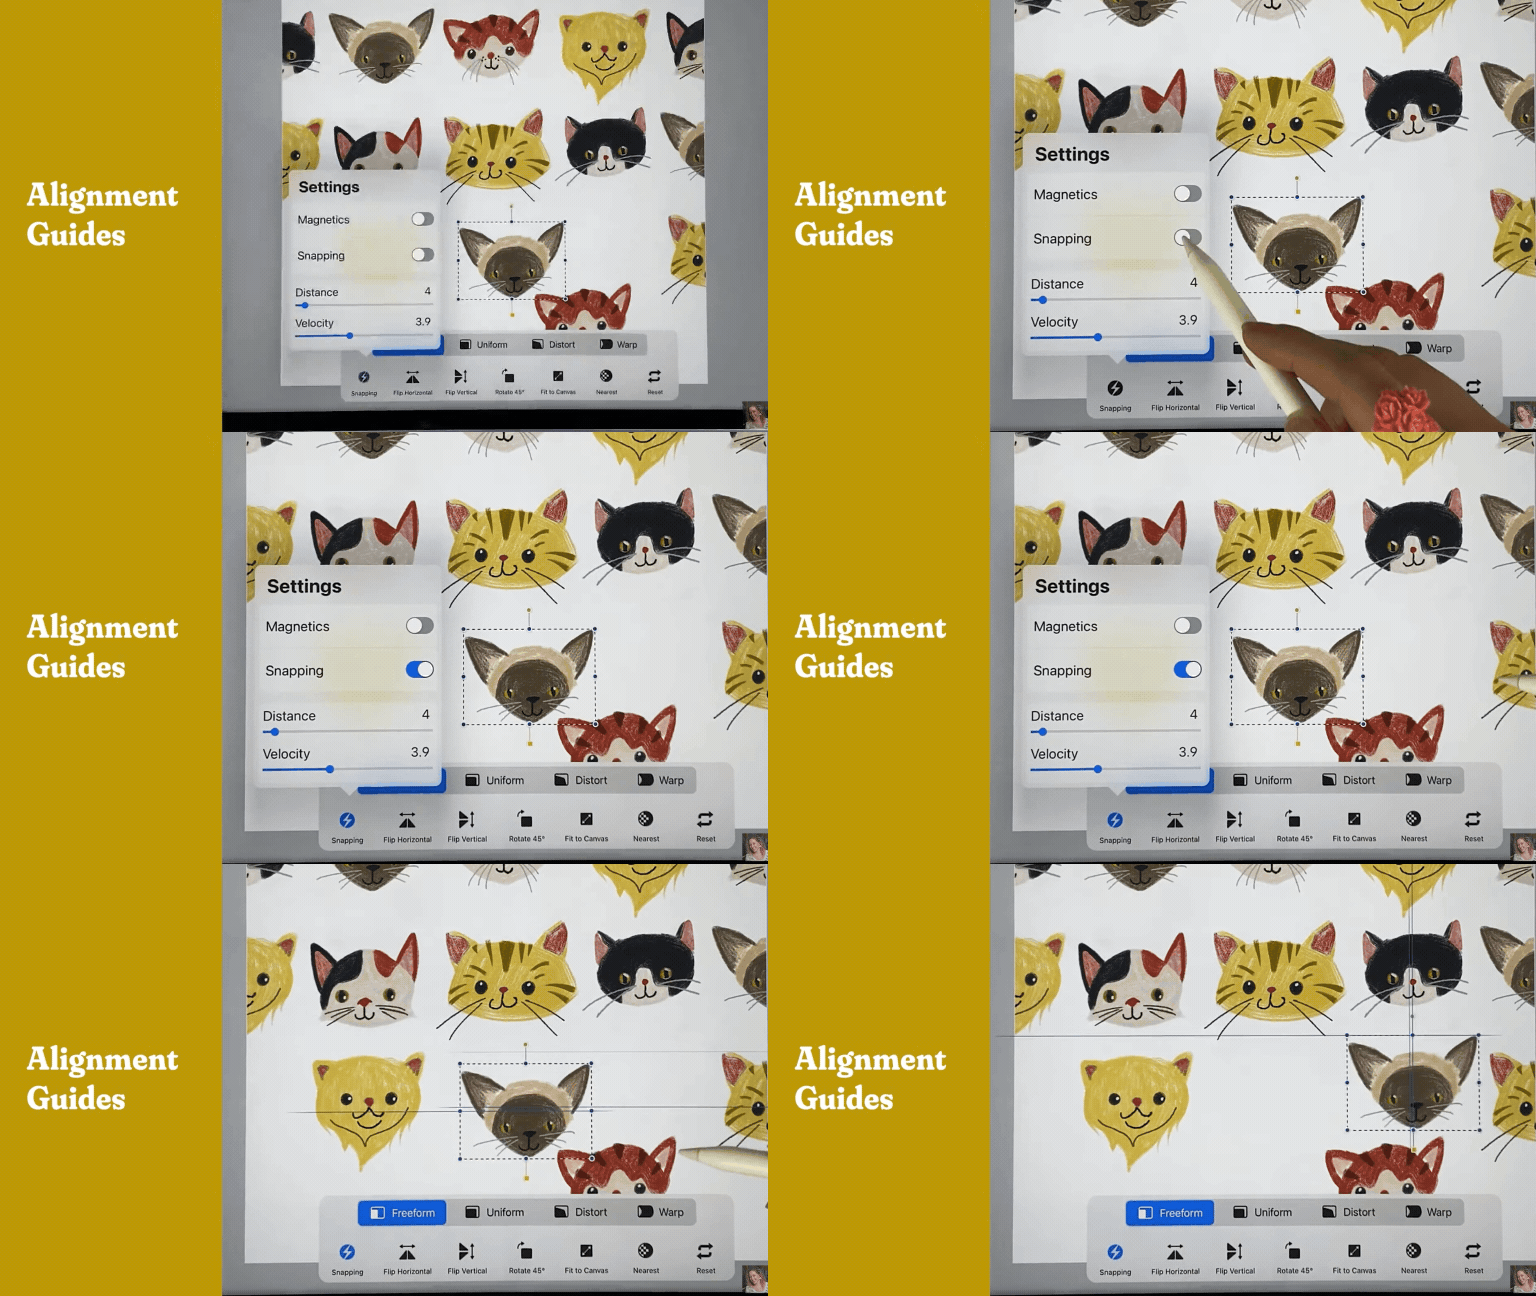
Turn on Alignment Guides (Snapping)
Want some guides to help you line up your objects perfectly? Turn on Snapping! This will automatically create guides that suggest good alignment.
Tap the Transform Button (the arrow button in the top left menu). Then toggle on “Snapping” in the bottom menu.
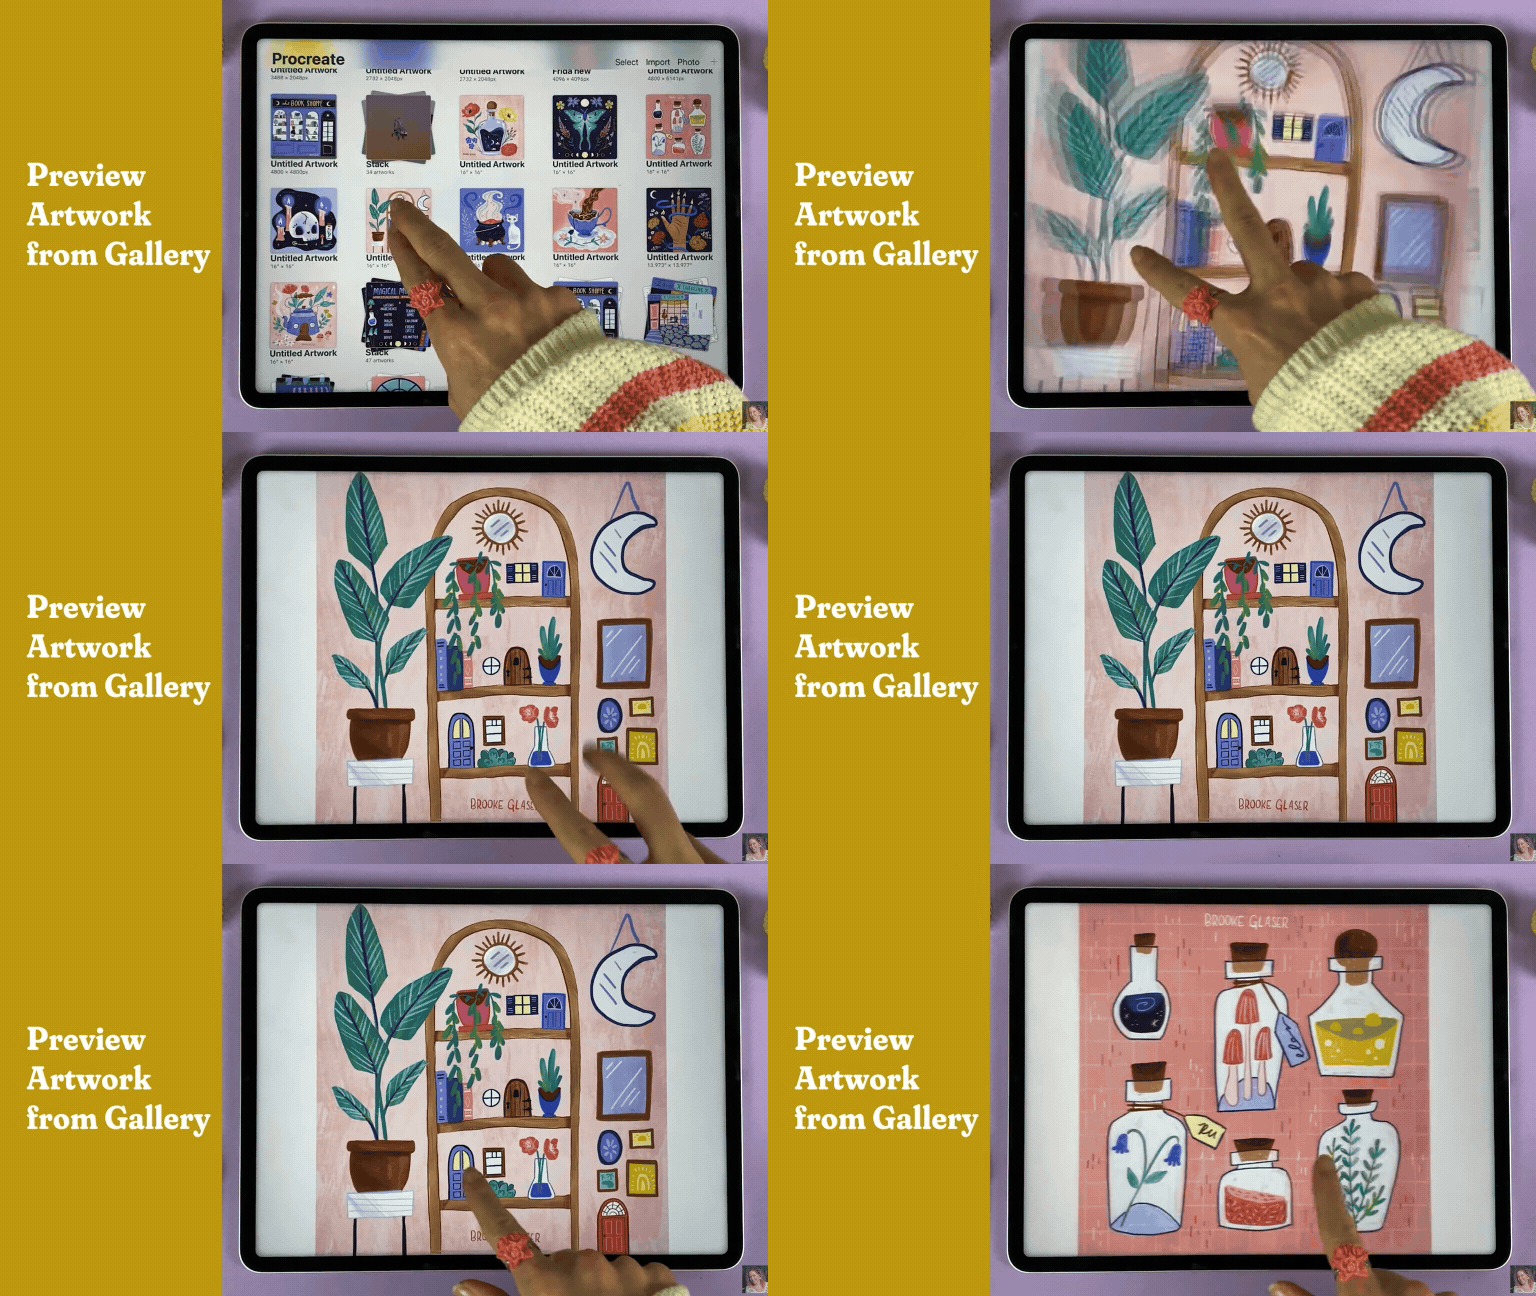
Preview Artwork from the Gallery
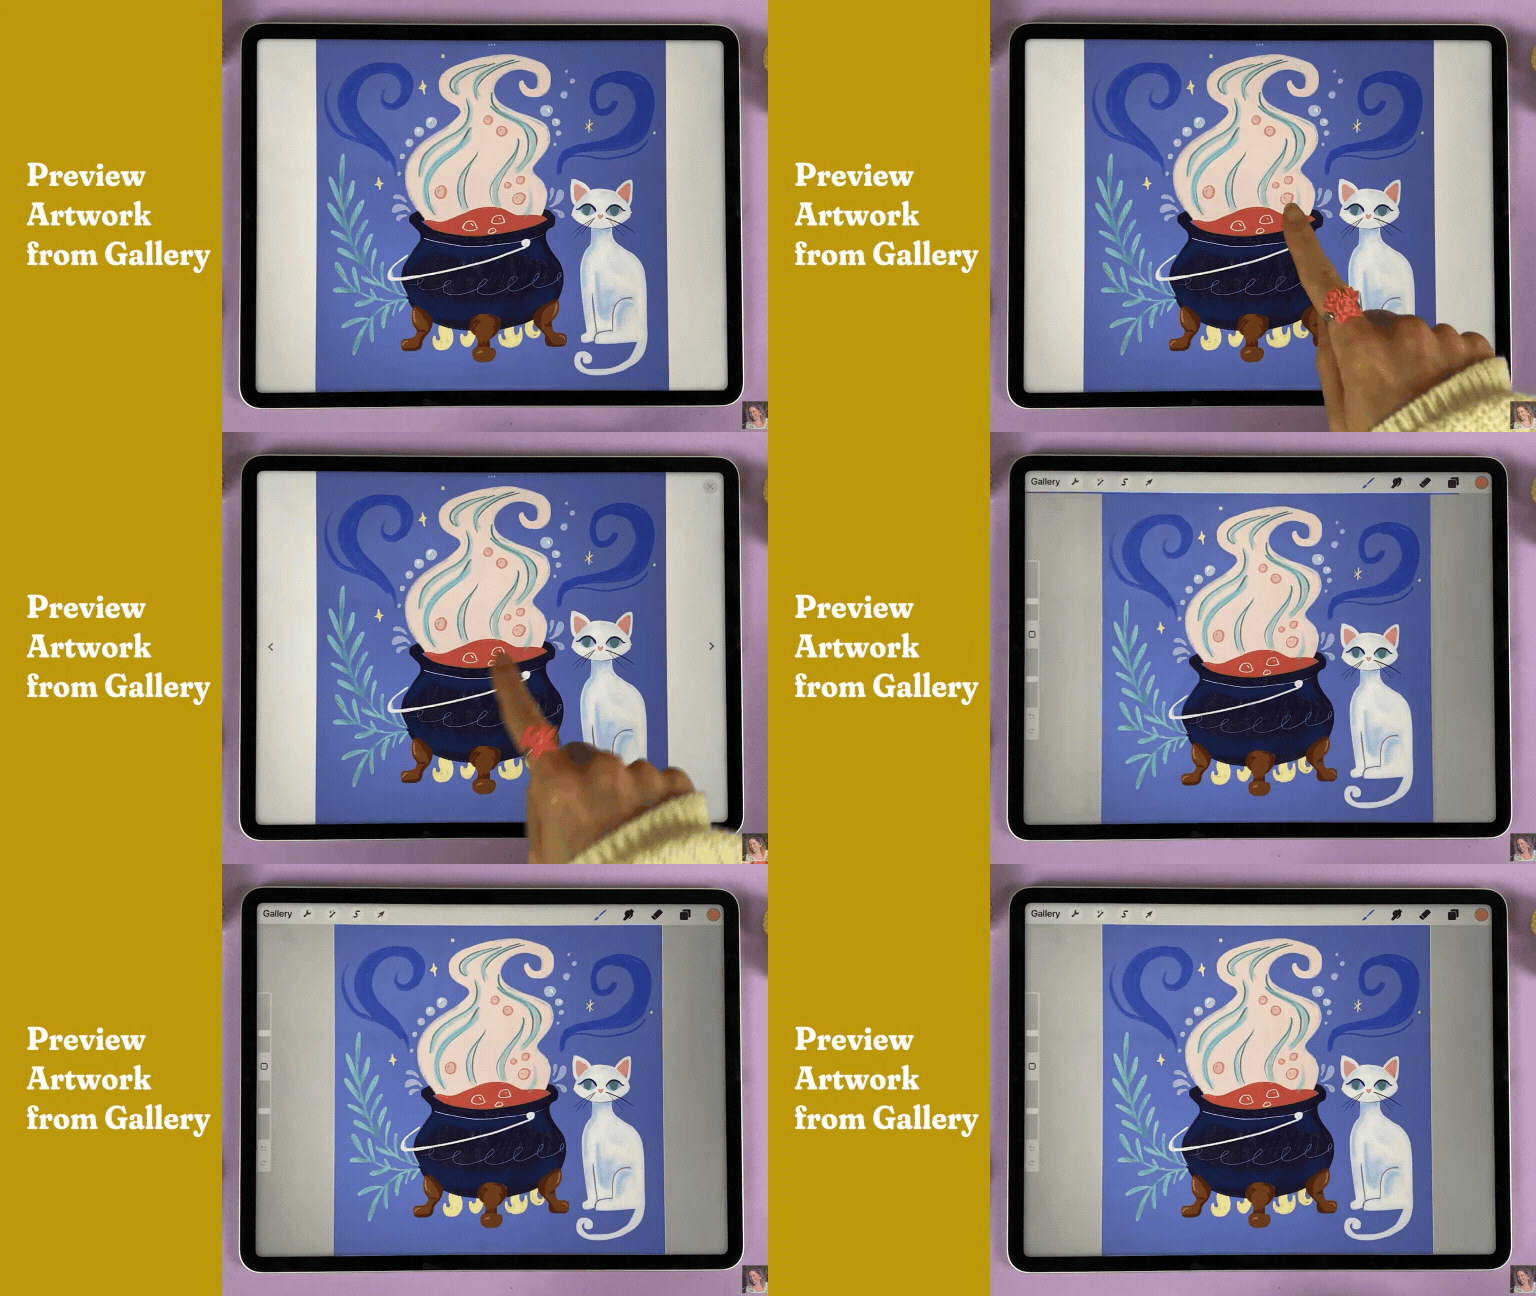
If you want to quickly view your artwork from the gallery, use two fingers to expand the piece. From there, you can swipe left and right to scroll through your artwork.
Open a Canvas from Preview
When you double tap on a piece of artwork in preview mode, it will open it so that you can easily edit it.
Ready to master these gestures (and more) in Procreate?
Procreate for Beginners will teach you everything you need to know to make beautiful art in Procreate. In just a couple of hours you’ll learn the ins and outs of Procreate through four fun drawing projects.
Hands-on experience is the key to mastering any skill. Join me in class to level-up your digital drawing skills through fun, step-by-step, bite-sized lessons.

